How To Apply Pvc Edging To Plywood

How To Apply Pvc Edging To Plywood

Plywood can be quite beautiful but can be difficult to work with. If you’re looking to make a table or other wooden furniture you may want to consider using edge banding to protect the edges of your work. This can be a good way to cover and protect the edges of your plywood but it is much more labor intensive than applying edge banding to a sheet of plywood with an iron.

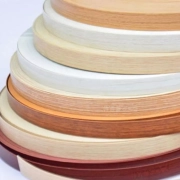
Edge banding is a material used to cover and protect the edges of wood

Plywood edge banding is a kind of edge trim that is used to protect the plywood from scratches and other damage. In addition, it also prevents the interior of the plywood from warping.

Edge bands can be applied to the edges of plywood, particleboard, and other wood types. They are available in different widths and thicknesses. It can be applied by hand or by using a machine. Choosing the right width depends on the design and type of wood that you are preparing to cover.

If you’re planning to cover the edges of your panels with plywood, it’s best to choose an edge band that will be durable and flexible. You can choose from various materials, such as melamine, polypropylene, or polyvinyl chloride.

The most common edge banding material is polyvinyl chloride. It’s inexpensive and easy to apply. However, it’s not as durable as other materials.

Acryliconitrile butadiene styrene (ABS) is another popular choice. It’s resistant to moisture and chemicals. This edge band is thermally resilient and can be colored to match the wood surface.

Polypropylene edge bands are very durable. They’re great for projects that are prone to moisture. Although they’re inexpensive, they’re not very strong, so you don’t want to use them for outdoor furniture.

There are also commercial edge bands that are thinner and more flexible. They can be used for curved or rounded edges. These are made with a hot-melt adhesive, which makes it more durable and flexible.

Edge banding can be glued on or stapled down. The glue can be polyvinyl acetate, PVA, or a branded glue. Generally, the glue dries clear and waterproof.

Another option is to apply edge banding with an iron. But be sure to apply it at the corners and not at the end of the board. Using an iron will make sure the edge banding sticks properly to the plywood.

To finish the edges of plywood, you can apply veneer. However, this can be a problem if you’re working with cheap plywood. Wood veneer doesn’t have the same high-quality look as solid wood.

It’s more time consuming than an iron-on edge banding

When you want to add a decorative finish to your woodwork, edge banding is one of the best solutions. It’s easy to install and comes in a wide variety of styles and materials.

Edge banding is usually applied with hot melt glue. However, it can be difficult to remove this type of adhesive. In some cases, a specialist solution may be required. If this happens, it can cause damage to your boards.

Another method is to use an iron on edge banding. This is a great way to finish a plywood edge. You can also use this method on low-heat-resistant materials. To apply, place a pre-heated iron on one end of the edge banding. Move the iron slowly to heat the adhesive. While it’s still hot, press the side edges of the banding back onto the substrate.

For a cheaper option, try a regular clothes iron. However, be sure to keep it level. Also, check to ensure that it’s not heating up the soleplate of the iron.

Another easy method for applying edge banding is by hand. However, this method can be time-consuming. Aside from the obvious time factor, you’ll need to prepare the substrate for the gluing. Before you start, you should protect the edge banding with a cotton cloth.

Alternatively, you can use painter’s tape to hold the glue in place. This method is especially important for longer, curved areas.

The best tape is PVC. Despite its durability, this material isn’t the most environmentally-friendly choice.

In fact, you may find that it’s more affordable to buy a cheap iron and make your own edge banding. You can buy an iron from a discount store or thrift shop. Just be sure to get an iron with a cotton setting.

You can also use a veneer saw or Heat Lock glue to attach different types of edge banding. Depending on the size of your project, you can cut the edge banding to the size you need. Alternatively, you can apply the edge banding with a machine.

Depending on the type of edge banding you’re using, you can also trim it to the desired length and thickness. But be sure to leave a half-inch border on either side.

Avoid rounding edges while applying

When applying plywood pvc edging, there are a few things you should do to make sure your end result is a successful one. One of the easiest ways to do this is to avoid rounding the edge. If you do this, you can create a much smoother finish. This is especially true if your project has curved edges.

In addition to making the end result smooth, you should also protect the inside layers of the plywood. For this, you’ll need to plan and flatten the boards.

To do this, you’ll need some sandpaper. You can buy sandpaper in a sanding block or a piece of sandpaper wrapped around a wood block. The sandpaper should be wrapped in a way that rubs downward at a slight angle.

You’ll also need some painter’s tape. This helps keep the glue in place. Some of these tapes are available in 250-foot rolls, which will be more than enough to cover the entire job.

Finally, you’ll need to apply some edge banding. These can be ironed or glued onto the edge of your plywood. They should be cut to the proper size. It’s important to leave at least half an inch of excess on each side.

The most efficient way to do this is to use pre-cut wood veneer or a strip of solid wood. These are easier to work with and make the edge look better. However, you should be careful not to burn your wood veneer if you apply it using an iron.

A few other tricks of the trade will help you achieve the best possible end result. One of these tricks is to use a sharp knife to trim the excess. Another is to sand the edges with a utility blade.

Lastly, it’s worth noting that you should never leave a hot iron in one spot for too long. Your hot iron could burn your wood and cause some of the adhesive to transfer to your clothes.

You might also consider a small puncture to fix a bubbled section of your edging.

Make your own edge banding

Edge banding can help you create a smooth surface on plywood. However, you need to apply the banding correctly to avoid peeling off. There are many methods of application. Some are simple, and others are more complex.

In the first method, you will need a hot iron, a piece of wood, and glue. You can also use a roller to press the edge banding into the plywood. This is the most effective way to apply wood veneer edge banding.

The second method is to press the edge banding with a piece of scrap wood. This will ensure that the glue gets into the wood. It is important to work on the entire flat surface, not just the edges.

Lastly, you can apply the edge banding with a sharp trimmer. However, it is more difficult to get the right shape. If you don’t have a good trimmer, you can simply cut the edge banding with a utility knife.

After you have cut your plywood to the size that you need, you can now begin the edge banding process. Start with the back side of the plywood, and run the edge banding over it. Be sure to overlap the edge banding slightly at the corners. Continue along the edge of the plywood until you reach the front side.

When you are finished with the edge banding process, you can use a sander to remove any remaining unevenness. This is especially important if your project is going to be viewed from the front.

Edge banding can be purchased in many materials. You can find a variety of colors and sizes. Make sure to choose the right thickness to match your plywood.

Edge banding can be applied to any edge on a piece of plywood. You can find pre-glued banding, which makes the process quick and easy. Alternatively, you can apply your own adhesive.

In addition to using the hot iron method, you can use double-sided tape to apply edge banding. However, you will need to fold the tape over so that the adhesive bonds.

4 Benefits of Edge Banding in Plywood

4 Benefits of Edge Banding in Plywood

If you have been considering the use of plywood in your home, you may be interested in the benefits of edge banding. Not only is it a cost effective way to add a little polish and refinement to an inexpensive piece of wood, but it can also prevent interior plywood from warping.

Prevents interior plywood from warping

If you’re planning to store interior plywood, there are ways to keep it in good shape. For starters, try storing it in a horizontal manner. This prevents uneven shrinking that could cause the wood to warp.

Another approach is to put a water-resistant sealant on the face of the board. Keeping it in a dry, cool and shaded location is also helpful. You may even want to use a dehumidifier to counter humid environments.

Warping is a problem that plagues all wooden products. Not only can it be dangerous, but it can affect the structural stability of the building materials.

The simplest way to avoid this is to store plywood in a flat, dry and cool location. However, it’s not always easy to do this in a small shop.

Plywood is made up of many layers. The layers can warp together if one is improperly stored. A common trick is to store it vertically, but this can be problematic when it comes to small shops.

To avoid the problem, store your lumber in a cool, dry and shaded location. Also, avoid storing wood that’s wet. It will swell and expand when it absorbs moisture from the air. That’s not necessarily a bad thing, but it can cause your underlying sheets to move.

The best way to avoid a problem is to purchase from a trusted source. Whether it’s a home improvement center or a lumber supplier, make sure you’re buying from a reputable company.

One way to prevent interior plywood from warping is to measure its moisture content. You can do this by taking a relative humidity reading. While the air temperature does not have any influence on its moisture level, it can help you find out what you’re dealing with.

Adds polish and refinement to an inexpensive piece of wood

Edge banding is a great way to give your furniture a more finished look. It can add polish and refinement to an inexpensive piece of wood. Depending on the style of your home, you can choose from different looks and colors.

There are two basic types of edge banding. The first is the straight edge banding. This type is typically more expensive. However, it gives you a more finished, professional look.

You can also choose curved edge banding. Curved bands are less common, but they can give your furniture a stylish look.

When choosing edge banding, make sure that it is compatible with your existing pieces. In addition, the finish can be painted or stained to match the rest of your home.

Edge banding can also help your projects last longer. It is durable and can withstand regular knocks and bumps. Also, it can protect your furniture from the elements.

Edge banding is available in many materials. It can be made from solid wood, veneer, and even acrylic. If you want a more polished look, you can buy edge banding that has been pre-stained.

During the application process, you can use a sander. You can use a random orbital sander to speed up the process. After the edges are smoothed, you can use a trimmer tool to cut off any excess veneer.

Edge banding can be applied with glue, nails, or screws. Using painter’s tape can keep the adhesive in place. Painter’s tape is especially useful if you have longer, curved areas.

Glues used to make edge banding are usually hot-melt adhesives. PVA glue dries clear and is water-resistant. PA glue is tough under low temperatures.

Provides a smooth finish

Edge banding is a useful and worthwhile way to add a little refinement to your plywood projects. It also makes the edge of your plywood look like it’s been cut into a solid board.

One of the best things about using edge banding is that it comes in a variety of shapes and sizes. This means that you can match the finish to your project’s wood surface.

The first thing to do is to select the correct kind of edge banding. PVC is one of the most common materials, but it can be made from other sources. You can also find edge banding made from exotic hardwoods. Some are even pre-sanded. Using the right edge banding will ensure that your finished piece is as durable as it is beautiful.

The next step is to use a utility knife to trim the edges of the plywood. This will not only make the edge look smooth, but will also hide the plywood’s corner joints.

After you’ve trimmed the edges, you can start ironing the edge banding to your plywood. Keep in mind that you don’t want to do this too soon, as it can burn the wood. Also, don’t sit the iron on one spot. Move back and forth over a section of about two feet. Doing this will allow the adhesive to warm up, which will make it more effective.

Before applying the edge banding, you can use sandpaper to buff out the corners. Use 120-220 grit sandpaper. You can also use a sharp block plane to achieve a micro-beveled edge.

When you’re ready to apply the edge banding, make sure to start with the least visible side of the plywood. This will allow you to create a strong bond with the edge banding and plywood.

Is suitable for curved surfaces and rounded edges

If you want to add some decorative touch to your plywood project, then edge banding is a good choice. This type of edging is durable, easy to install, and can be applied to all sorts of curved surfaces. However, there are some things to keep in mind before you get started.

In general, you should use the same width and thickness of edge banding as the plywood you are using. There are some types of edge banding that are not as flexible as others, so it’s important to choose the right one for the job. Using the wrong kind can lead to serious maintenance problems.

Edge banding is available in different colors, sizes, and species. It can be purchased in rolls or in glue-less strips. You can also paint it to match your plywood’s finish.

Edge banding is great for covering up unfinished edges on plywood and other wood surfaces. When you are building furniture, the edge of the board can sometimes be very visible, so it is best to cover it. Whether you are finishing a cabinet, a desk, or a bookcase, you can give your project a polished look by adding edge banding.

You can apply edge banding by hand or by machine. Both options require cutting the plywood and the edge banding to the right size.

Using the right edge banding can protect your wood from moisture and wear. The most popular choices include laminated and polypropylene. Laminated edge banding is more flexible, so it is better suited for curved surfaces. Polypropylene is less susceptible to moisture and is easier to clean.

While the most common type of edge banding is made from polypropylene, there are many other options, including melamine and ABS. Melamine is especially good because it is UV light resistant.
Is durable

Whether you’re building a new cabinet or adding an extra touch to your furniture, plywood edge banding is an excellent choice for adding a durable finish. There are several different types to choose from, including solid wood, veneer, and PVC. It’s important to decide what type of material you want your banding to be made of, because it can affect how well it will hold up.

Solid wood edge banding is highly durable, and will resist chipping and warping. It is available in a variety of thicknesses and can be stained to match your project. You can also find edge bands in exotic species.

Edge banding is usually applied to the edges of plywood, but can be used on other materials as well. Whether you need a solid wood, metal, or melamine edge banding, you can find it in a range of colors and widths.

If you’re looking for a cheap, durable, and easy to apply solution for edge banding, you should consider PVC. PVC can be used on nearly any kind of wood. And the banding is easily cut to curve the edges.

Depending on what you’re looking for, you can also buy edge banding that’s been pre-glued. This means you’ll be able to use a nail gun or stapler to install the edge banding. However, this can be time consuming.

Hot-melt glue edge banding is another popular option. This is less expensive than the other two options, and it is more convenient to use. However, it isn’t as strong or durable. Unless you’re working with a heavy-duty application, it isn’t recommended for outdoor furniture.

Iron-on edge banding is another way to add a durable finish to your plywood project. To apply it, you’ll first need to use a hot-melt adhesive on the back of a piece of wood veneer. After the adhesive has cooled, you can then iron it onto the surface.

PVC Edge Banding for Plywood - 10 Things You Should Know

PVC Edge Banding for Plywood – 10 Things You Should Know

PVC Edge Banding for Plywood – 10 Things You Should Know

PVC Edge Banding for Plywood - 10 Things You Should Know

If you have been thinking of using PVC edge banding for your plywood projects, there are a few things you should know. These tips will help you make the best choice for your projects.

Installing

PVC edge banding is a great way to protect the edges of plywood or solid wood panels. It is durable, easy to maintain, and affordable. You can find a wide variety of colors and finishes to fit your needs.

In order to install PVC edge banding trim properly, you’ll need to make sure you use the right tools. Using the wrong ones can lead to premature deterioration of your product. Also, using too much heat may cause the adhesive to not be strong enough. Getting the right help from a professional can ensure you get the best results.

First, you’ll need to cut the edges of the banding to size. This can be done with a pair of good scissors. For a more flush edge, you’ll need to use a special edge banding tool.

Next, you’ll need to apply a good adhesive to the backside of the banding. You can either use a contact cement or hot melt adhesive. The glue should be applied to the whole edge of the plywood. If the adhesive isn’t enough, you may need to add more.

Once the glue has dried, you can begin putting on the edge banding. Start with the back side of the plywood and move to the front. Continue working your way to the other sides.

After all of the banding is in place, you’ll want to wrap the edges in protective tape. This should seal the PVC edge banding from moisture. Be sure to store the material in a dry, cool area.

You’ll also need a brayer to smooth out the edges. You can use a rolling tool for a better finish.

When installing PVC edge banding, it’s important to read the instructions. They can be very specific and include tips on how to install the product. Taking the time to read the instructions will help you avoid making common mistakes.

If you’re new to installing PVC edge banding, it’s a good idea to consult a professional. Their expertise can ensure you’re using the right tools, and that the installation will go smoothly. Professionals can also give you more information on the different materials, techniques, and tools you’ll need.

Identifying the right edge banding for your needs

PVC edge banding is a simple and cost-effective way to add protection and style to your plywood project. It’s available in a variety of thicknesses and colors, making it ideal for a variety of applications. However, it’s important to get the right thickness for your project.

A few factors will determine the thickness of your edge banding. First, you’ll need to find the right width for your plywood. This will depend on the shape and size of your project. If you’re working on a large surface, you’ll want to choose a wider edge banding. Alternatively, if you’re working on a smaller project, you’ll need a thinner edge banding.

Next, you’ll need to select an adhesive that works with your PVC edge banding tape. Most commonly, a hot-melt adhesive is used. You can find this type of adhesive at home improvement stores or online retailers. In addition, you can also find glueless adhesives.

When choosing a PVC edge banding, you’ll want to be sure to use a working tool to apply the adhesive to the plywood. Doing so will prevent common mistakes. Also, you’ll ensure that the bond is strong enough to hold up against wear.

Depending on the application, you may need to use a primer. This will give you better adhesion. Another advantage of using a primer is that it will help prevent discoloration over time.

Finally, you’ll need to protect the edge banding from moisture and extreme temperatures. The PVC can become damaged if left out in the sunlight or exposed to heat. Therefore, it’s best to store the material in a cool, dark place.

Once you’ve chosen the right PVC edge banding, follow the manufacturer’s instructions to install it. Careful installation will keep the material in good condition for many years.

Edge banding can be made from a variety of materials, including wood, plastic, laser, and PET. The most popular materials are PVC and ABS. Choosing the right type of material isn’t a difficult task. Just be sure to shop around and gather the information you need.

Edge banding is an easy way to finish your project, but it isn’t without its limitations. Be sure to read the instructions carefully and consult with a professional to get advice on how to properly install it.

Removing

If you have installed PVC edge banding on your plywood project, you may be wondering how to remove it. Fortunately, this task is not as difficult as you might think. The key is to take the right steps and follow proper instructions.

First, you will need to use the appropriate tools. An edgebanding trimmer is useful for removing the excess banding. Similarly, a utility knife or a router may also help. However, it’s a good idea to consult with a professional before you attempt this task. This will ensure the process goes smoothly and safely.

After installing the edge banding, you should store the material away from harsh temperatures. This will prevent the material from absorbing excessive moisture, which can cause premature deterioration of the product.

You should also check the adhesive before you use it. Using the wrong kind can damage the board. Some adhesives have chemicals that can discolor the edge banding. Use a high-quality adhesive or consult with a professional for advice.

Before applying the edge banding, you should make sure that you have properly measured the area. The correct measurements will ensure that you are able to apply the PVC correctly.

There are a variety of different types of edge banding available. The most popular are made from PVC. Using this type of material can provide you with a long-lasting, durable finish. It’s also very flexible, which can make it easy to bend it to a desired shape.

In addition to this, you can also choose from a wide range of colours. When choosing, make sure you choose the UV protection. This will prevent the PVC from discoloring over time.

Lastly, you should consider the time it takes to complete your project. Having a clear timetable can prevent mistakes and keep the results successful.

Depending on the size of your project, you might need to use additional tools. Whether you choose a power trimmer or a handheld iron, you will need to follow the proper instructions.

Ultimately, you’ll need to consult with a professional to determine the best way to remove PVC edge banding. They can give you valuable insight into the materials and techniques that work best.

Proper storage

Proper storage of PVC edge banding is essential to its durability and longevity. If the material is stored incorrectly, it can warp or discolor. By storing the material in a cool, dry place, you can ensure its longevity.

PVC edge banding is a cost-effective solution for a wide range of applications. It is available in many colors, shapes, and sizes.

PVC edge banding is also easy to install. You can use a simple hand iron or a specialized edge banding machine. When installing the product, you should follow the manufacturer’s instructions for a smooth and secure bond.

When installing PVC edge banding, you should wear protective eyewear and equipment. Using the proper tools can prevent common mistakes. Also, working with the correct adhesive will ensure the glue is strong and holds the material in place.

Whether you are installing PVC edge banding yourself or hiring a professional, it is important to follow instructions to avoid damage. Make sure to keep the work area clean and free of debris. Avoid working near sources of heat. The material can become hot, which can lead to premature deterioration.

To protect the PVC edge banding from extreme temperatures, it is best to store it in a cool, dark place. In addition, you should wrap it with plastic to avoid dust and moisture.

If you have a curved edge, you may need a hard roller. If you don’t have access to an edge banding trimmer, you can use a clothes iron or veneer saw.

You can also use a hot melt glue for edge banding. Depending on the type of PVC, you should adjust the temperature of the glue to prevent it from cracking. However, you should never use a hot glue on furniture.

Adding UV protection can also prevent discoloration of the material. UV light can damage primer. Some edgings are not resistant to UV light, so they are best stored in a tightly sealed plastic bag.

Proper installation and maintenance of PVC edge banding stripe can help your project last for years. Wipe down the product, and remove any dirt or grime.

4 Environmental Considerations When Using Decorative Wall Panels

4 Environmental Considerations When Using Decorative Wall Panels

4 Environmental Considerations When Using Decorative Wall Panels

4 Environmental Considerations When Using Decorative Wall Panels

If you are considering using decorative wall panels in your home, it is important to consider the environment in which the walls are being hung. This is especially true if you plan to use the panels in a child’s room. Using panels with non-toxic materials will help to ensure that children have a safe place to play.

Phthalates

Phthalates are a group of synthetic, semi-volatile organic compounds that are used in plasticizers, fragrances, personal care products, household cleaners and food packaging. They are also known to affect the health of children.

Since the advent of the Consumer Product Safety Act, manufacturers have been prohibited from using certain phthalates in children’s products. Although phthalates are used in many products, they are not yet regulated in building materials.

In China, phthalates are found in a variety of synthetic decoration materials. These materials include plastic toys, soft polymers, wall papers and PVC flooring.

Children are particularly susceptible to the effects of phthalates. This is due to the fact that they are more likely to ingest contaminated dust. Because of this, it is important to know how phthalates get transferred from one object to another.

The US Consumer Product Safety Commission (CPSC) is required to investigate and report on the presence of phthalates in consumer products. Toys that contain DEHP, for example, were voluntarily recalled by toy manufacturers in the US.

There are some phthalates that have been shown to be carcinogens and asthmagens. However, the majority of phthalates have low concern. Similarly, the European Union has issued warning labels for phthalates.

One of the first phthalates to raise red flags was di-n-octyl phthalate (DiNP). DiNP was later linked to male genital birth defects.

Another phthalate that raised concerns was diethyl phthalate (DEHP). It has been linked to sperm counts and male genitalia deformities in rodent trials.

A number of academic studies and policy reports have voiced concern over phthalates. Several Prop 65 settlements have been reached for phthalates in a variety of products.

Target, Walmart and others have also launched initiatives to eliminate toxic chemicals. However, the regulatory process for consumer products is slow.

Heavy metal stabilizers

Heavy metal stabilizers have been around for many years, but recent studies have discovered that they are responsible for a number of health hazards. These include neurodevelopmental problems, reproductive issues, thyroid disruption, and cancer. The good news is that this isn’t the end of the story.

Some manufacturers have come up with ways to mitigate the hazards of heavy metals in decorative wall panels. For instance, Morton International has developed Advaflex, a heat stabilizer technology that uses only organic compounds. This product is a low-cost and environmentally friendly alternative to traditional metal stabilizers.

In fact, this Advaflex technology is so effective that it’s capable of reducing the amount of primary metal stabilizer needed by up to 75%. It’s also compatible with a wide variety of PVC additives, including low-level metal carboxylates. Moreover, it is hydrolytically stable and oxidatively safe.

Although the Advaflex has a wide range of applications, it is targeted at the flooring and caled film industries. Nevertheless, it is also a cost-effective product that should appeal to all parties involved.

One of the most interesting Advaflex gimmicks is the LM-300 system, which allows users to combine several metallic species into one cohesive stabilizer. This system is particularly effective when used with Ca/Zn and Ba/Zn/P.

Another is the Thermolite, a hardboard stabilizer sandwiched between polyisocyanurate foam. Both products are effective at absorbing water, but the foam version is known to cause unsightly swelling.

Finally, there are a few other aforementioned Advaflex technologies, such as Advaflex LM-2000, a drop-in replacement for standard mixed-metal stabilizers. These systems are a great way to minimize the waste of primary metal stabilizers while enhancing the performance of finished insulated metal panels.
NFPA 701 standard methods of fire tests for flame resistant textiles and films

If you need to buy a fabric for a drapery or window treatment application, be sure it has passed the NFPA 701 test. This national standard is designed to protect the public from fires caused by hanging textiles.

This test measures the ignition resistance of fabrics after a 12-second exposure to a flame. The results are used by code officials for window treatments and other applications that involve vertical hanging textiles.

In the United States, all drapery fabrics and awnings must meet the requirements of the NFPA 701 standard. There are also specific standards for certain fabrics depending on their intended use. These include draperies, awnings, tents, and roller shades.

Fabrics are classified according to the type of test used. For example, a single sheet of fabric is tested in a small-flame test, while a folded fabric is tested in a large-flame test. A fabric can also be chemically treated to pass the CAN/ULC-S109 flame-resistant fabrics and films test.

Test Methods 1 and 2 of the NFPA 701 standard are primarily geared to assessing the flame propagation of flammable materials. This includes both fabrics and plastic films.

Test Methods 1 and 2 are used to evaluate the flammability of fabrics used in window treatments, draperies, and other vertically hanging applications. This includes linings and fabrics with vinyl coating.

The limiting oxygen index (LOI) is a measure of the minimum amount of oxygen in the atmosphere that can ignite a flame. The value is expressed as a percent volume of air.

Several state and local governments have passed regulations that require all drapery fabrics and awnings to meet the NFPA 701 standard. Additionally, several cities have implemented mandatory requirements for fire retardant fabrics in public spaces.

Maintenance-friendly

If you’re looking to update your room and want to avoid the hassle of maintaining wallpaper, consider a decorative wall panel. Decorative wall panels can help you hide any flaws in your wall, like wires or dirt stains, while still adding design interest to the space.

Decorative wall panels are made from a durable substrate, which means that they’re easy to install and clean. However, they’re also susceptible to wear and tear over time. To maintain the original look and feel of your decorative wall panels, you should follow a few quick tips.

One of the best ways to protect your decorative wall panels is to keep them away from moisture. Water can cause a laminate finish to separate from the substrate. You should store your decorative wall panels in a dry, cool place.

Another way to ensure your panels’ longevity is to keep them from fading with extended sunlight exposure. You can also add curtains to soften the light that hits your decorative finishes.

Lastly, keep your decorative wall panels in storage away from direct sunlight. They tend to collect dust, so regular dusting is recommended.

The easiest way to clean your decorative wall panels is to use a mild soap solution on a soft cloth. Apply the solution in a uniform motion and rinse off the excess water with a clean cloth.

Alternatively, if you have a fabric-covered wall panel, you can use a vacuum cleaner to remove the dust. Make sure to use a cloth that’s lint-free for maximum effectiveness.

Finally, avoid using harsh solvent cleaners on the surface of your wall panels. These will likely damage the panel and may leave permanent marks.

Health risks

If you’re considering installing a new wall covering in your next renovation or building upgrade, here are three things to consider. The big three are: asbestos, mold and microbial growth, and color fading. The best way to combat these maladies is to take the time to inspect your new walls for unsightly black marks. In the same vein, you should heed the advice of decor experts and professional designers. The best way to do this is to schedule a meeting with a reputable designer. One caveat: be wary of designers who are on the prowl for a quick buck. Also, beware of unscrupulous contractors.

Can Decorative Wall Panels Be Used to Hide Electrical Or Plumbing Features

Can Decorative Wall Panels Be Used to Hide Electrical Or Plumbing Features?

Can Decorative Wall Panels Be Used to Hide Electrical Or Plumbing Features?

Can Decorative Wall Panels Be Used to Hide Electrical Or Plumbing Features

When it comes to deciding on how to go about decorating your walls, you may want to consider using decorative wall panels. These wall coverings are available in a variety of different materials, including faux brick, wood and reclaimed wood. The best thing about them is that they are easy to apply.

Faux brick

Faux brick decorative wall panels are a great way to make your walls more interesting. They’re also relatively easy to install. In addition, they’re a less expensive alternative to real brick.

Before you begin, you’ll want to measure the area you’re working on. Then, use a level to create a plumb line, about 48 inches from the nearest wall. Use a spirit level or a laser level to mark the starting point of the first course of panels.

Once you’ve centered the first panel on the reference line, you can start attaching it. You’ll need a jointing tool for this step, which helps smooth out the joints between bricks. This is especially important for exposed brick, which requires tight seams.

When you’re ready to finish, you’ll need to staple the new panel in place. Make sure you’re working on a level surface, or else you may damage the panels.

The faux bricks on your panels must be consistent. You don’t want them to look like they’re floating around. Also, you’ll want to be consistent with the spacing between bricks.

There are two basic types of faux brick: thin brick and brick veneer. Thin brick is made from the same clay as traditional masonry bricks. Brick veneer is more porous, and it can absorb moisture. However, it’s easier to maintain than brick.

If you’re worried about the potential for damage to your brick panels, you might want to use a construction adhesive to keep them in place. Be sure to use a caulk gun to fill the small gaps between bricks, but avoid applying the adhesive too close to the edge.

Alternatively, you could choose to paint your bricks. A textured paint will hide imperfections and add a unique touch to your wall. But textured paints aren’t always easy to clean, and you’ll need to regularly repaint to maintain their appearance.

Tongue-and-groove

Tongue-and-groove decorative wall panels are a great way to add a unique aesthetic to your home. This type of paneling combines the appearance of shiplap wood paneling with the durability of the tongue and groove method. It can be used on both interior and exterior walls.

Tongue-and-groove panels are available in several different materials. Some are made from wood, while others are synthetic. Regardless of the material, they will add character and warmth to any home.

Tongue-and-groove wall paneling can be painted to match your home’s style. It also offers a tight seal, which prevents moisture from escaping. Installing the material can be a little more complex than using shiplap, though it’s easy enough.

The cost of installing tongue-and-groove panels can range from $4 to $8 per square foot. If you choose to do it yourself, you can save a considerable amount of money. Plus, you’ll have the satisfaction of knowing that you installed your own panels.

When you use tongue-and-groove panels, you’ll be able to create a barn-like, rustic look for your walls. They also add insulation and durability. Using this type of paneling will save you a significant amount of energy during the cold months of the year.

The paneling is available in many different styles and colors. Whether you’re looking for a warm, natural look or a more contemporary feel, you’re sure to find the perfect option.

If you plan to install the tongue-and-groove panels in a room that receives a lot of direct sunlight, you’ll want to choose a paint that will shield the surface from harmful UV rays. There are a variety of paints that will work, but you may also want to consider a clear coat sealer to protect the panels against water.

Whitewashed

Whitewashed decorative wall panels are a great way to cover up any plumbing or electrical features that may have been left unattended. Although these products are not meant to replace your home’s original walls, they do add a bit of class to your interior design. The key is to buy from a reputable provider and select the highest quality product for your project.

There are many kinds of decorative wall panels available on the market. You can opt for traditional wood paneling, or you can choose a more modern alternative such as a faux brick or stone finish. Whether you are looking for a complete overhaul of your home’s aesthetic or simply want to add some character to your abode, you’re sure to find a solution to fit your needs.

Despite the fact that it is not always easy to determine which panel will be the best fit for your home, there are a few simple steps that will ensure your next project is a success. These tips and tricks will allow you to save time, money and frustration.

Reclaimed wood

Reclaimed wood decorative wall panels can add style to any room and they are also an environmentally friendly option. The right choice of wood can help create a dramatic focal point or a more subtle accent wall.

Reclaimed lumber can come from a variety of sources. It can be found in barns, boats, sheds, or commercial buildings. However, the quality and integrity of these materials can vary greatly. If you are not sure where to find these materials, consult a professional.

Reclaimed lumber can be found in a variety of species, sizes, and colors. Depending on the wood’s age, it may have slight imperfections, such as knot holes, or be a bit uneven in thickness.

Typically, these panels are lightweight, non-combustible, and easy to install over a solid substrate. They are available in four different wood grain patterns. In addition to their aesthetic appeal, they are highly durable and require minimal maintenance.

Before installing reclaimed wood decorative wall panels, make sure to prepare the wood for use. You should stain the wood to create a weathered finish. Depending on the type of wood, you may need to sand down the paneling for a smooth finish.

During installation, be sure to leave at least a half-inch gap between each plank. You should also keep the edges of the planks away from each other. This will prevent the seams from closing in.

Whether you choose reclaimed or new, your paneling should be stored in a dry, cool area. Once installed, you’ll need to regularly wipe the paneling with a cloth. Also, be sure to avoid using metallic finishes or a metallic paint.

Choosing the best material for your project can take some time. If you’re not comfortable working with reclaimed wood, a professional carpenter can help you. Alternatively, you can buy salvaged or new wood boards that are already finished and ready to install.

Peel-and-stick decals

Peel and stick decals are the perfect way to add some flair to your walls. They are easy to install and remove, and can be used for virtually any theme. You can even swap out the ones you’ve already got if you’re not satisfied with your current decor.

To get the most out of your new wall sticker, you’ll need to apply it properly. The best way to do this is by following these steps:

First, decide which area of your wall will be the focus of your decor. For example, you could put your accent wall in the bedroom, or in the dining room. Once you’ve made this decision, you’ll need to sand down the surface and remove any dust or dirt. This may seem like a pain, but it’s well worth the effort. After this is complete, apply your decal using a method that suits your personal preferences. Using a spray adhesive is best, as is applying it using a squeegee or sponge.

If you’re a real stickler for detail, you can follow the same procedure on every edge of the decal. In particular, be sure to apply it from the top down and avoid placing it too close to the corner, as it will leave a sticky residue.

It’s also a good idea to use a hairdryer to loosen any stubborn decals. Alternatively, you could purchase a specialty kit. Lastly, be sure to wash off any excess adhesive before you apply your decal. You want to be able to take it off without a major smudge.

A peel and stick decal is a great way to decorate your home without breaking the bank. When shopping, be sure to look for a good quality product that’s available in multiple colors and sizes.

Why PVC Foil is the Ideal Material for Your Home's Interior Walls and Ceilings

Why PVC Foil is the Ideal Material for Your Home’s Interior Walls and Ceilings

Why PVC Foil is the Ideal Material for Your Home’s Interior Walls and Ceilings

Why PVC Foil is the Ideal Material for Your Home's Interior Walls and Ceilings

When it comes to making your home more appealing, you will want to find a material that will not only enhance the overall look of your home, but also last a long time. The type of materials that you can use for the interior walls and ceilings of your house will depend on a few factors. These include durability, eco-friendliness, and price.

Durability

PVC Foil is a strong and durable material that can be used for interior walls and ceilings. This type of material is available in a wide variety of textures. It is perfect for bathrooms, kitchens, and other high-traffic areas.

There are many reasons why you should choose PVC for your next project. It is very durable, lightweight, and easy to clean. Plus, it can be recycled.

Whether you’re looking to install PVC panels in your home or office, they are a practical, cost-effective choice. You can also customize your wall panels with decorative designs, prints, mosaic patterns, and woven images.

In addition to being extremely durable, PVC is fire-resistant and easy to maintain. It doesn’t mold or absorb water. If you have a project that requires a new installation, PVC panels can be easily installed and dismantled.

In addition, there are certain types of PVC that have good electrical insulation properties. They are often used for power distribution and wiring in homes and other buildings.

PVC is also a versatile polymer that is able to be used for a wide range of applications. This material can be found in a number of products, including medical devices, drug delivery systems, and surgical instruments.

The PVC industry is a global economic contributor. It provides a safe working environment and employment opportunities for many people.

Another advantage of using PVC is that it is completely recyclable. It is also known for its long life. Depending on the types of PVC you choose, it can last up to 100 years.

While some competing materials claim environmental advantages over PVC, these claims are usually based on misconceptions or biased opinions.

Eco-friendliness

PVC Foil is a highly durable and insulating material for your interior walls and ceilings. It offers great impact strength and a good vapour barrier.

Using PVC Foil in your home is a great way to save energy and money. You will also be doing your part to protect the environment.

PVC is a durable and lightweight polymer. Depending on the type you choose, you can expect it to last for many years. And it’s recyclable.

Another good thing about PVC is that it is light and easy to install. This makes it a popular choice for electrical wiring and plumbing in homes.

PVC is available in a variety of colors and finishes. For example, you can get a plank groove pattern or a wooden texture that mimics the look of real wood. These are great in bathrooms and kitchens.

Some of the most common colors for ceilings are shades of white. But it’s important to use the right insulation to save energy.

Another benefit of using PVC for your home’s insulation is that it’s affordable. Many insulation products are made from recycled materials, which reduces the amount of waste that is produced.

While choosing insulation, you should also consider the type of barrier you want. Choosing the wrong type can lead to more expensive electricity bills. To make sure you’re getting the most value from your investment, you should consider the temperature of your home, as well as the climate in your area.

Lastly, you should consider the quality of the materials you choose. Aside from being eco-friendly, they should also be safe for your family. Choose materials that are non-toxic and recyclable.

Plasticisers used in PVC products

Plasticisers are additives that increase the flexibility and mechanical properties of PVC. They are also used to enhance the UV resistance of the polymer. Depending on the type, they may be bio-based or partially bio-based. There are a number of common plasticisers that are used for interior walls and ceilings.

Di-2-ethylhexyl phthalate is one of the most widely used plasticizers in PVC. It offers good gelling, flexibility, electrical properties, and is odorless and colorless. This molecule has an ion exchange ability that helps to improve the flow of the polymer.

The low-cost, light-weight, and durable nature of PVC makes it ideal for construction applications. Flexible PVC is frequently used in carpet backing and upholstery textiles, as well as in acoustic ceiling surfaces.

Benzoate and dibenzoate esters are highly solvating plasticisers that are effective in lowering the viscosity of the PVC resin. However, they are not generally considered as primary plasticizers for PVC.

There are several types of vegetable oil derivatives that are used as plasticizers. Some of them are derived from renewably sourced alkanoic acids and have been used in a variety of building & construction end uses. In addition to this, bio-based plasticizers are derived from renewably sourced isosorbides.

Polyvinyl chloride is a common compound used for films, pipes, and electrical insulation. Other applications include roofing materials, flooring, and window profiles. Several optional additives are available to further increase the flexibility of PVC. These additives can include UV stabilisers, fillers, and impact modifiers.

Another important factor to consider when choosing a plasticizer is compatibility with the polymer. If there is incompatibility, it can lead to exudation, cracking, or migration. Also, the temperature and humidity of the environment can change over time, and this can affect the migration or migration of a plasticizer.

False ceiling rate per sq ft

The price of false ceiling varies from region to region. Generally, false ceiling is priced based on the material used. It also includes the labour costs involved.

Gypsum and Plaster of Paris are the most common materials used for False Ceilings. These materials are durable and easy to maintain. However, they are also expensive. If you want to save money and get the best False Ceilings, opt for PVC.

PVC false ceilings are becoming more and more popular in the market because of their durability and easy maintenance. They are highly waterproof and are also termite-proof. Also, they are easily installed. You can use PVC false ceilings for commercial or residential applications.

In addition, you can find a variety of colours and shapes for your PVC False Ceiling. This is an excellent way to hide a wall or ceiling that looks dull.

Another advantage of PVC false ceilings is that they are easy to install. Moreover, they can be polished and painted. Therefore, they can cover any defect.

The cost of PVC false ceilings varies based on the material. Usually, they are used in commercial buildings. A typical False Ceiling rate per sq ft is between Rs75 and Rs120.

However, the price is higher if you opt for a combination of gypsum and other materials. For example, if you opt for a laminate ceiling, it will cost you between Rs700 and Rs920. Similarly, if you choose to use wood for your False Ceiling, you will have to spend around Rs350 to Rs600.

Although it is not the most common option, PVC false ceilings are a popular choice among many property owners. Whether you have a budget or not, these options are worth considering.

Cost Considerations When Using Decorative Wall Panels

Cost Considerations When Using Decorative Wall Panels

Cost Considerations When Using Decorative Wall Panels

Cost Considerations When Using Decorative Wall Panels

Decorative wall panels are a wonderful way to add a touch of style and grace to your home. There are many ways to create an attractive look, from installing a traditional shiplap or cultured stone to laminated, solid surface or even furring strips. Before you begin the process of installing your decorative panels, you need to make sure that you are aware of the various costs. By understanding the factors that influence the cost of your new panel, you can make the best choice for your space.

Shiplap

Shiplap decorative wall panels are a stylish way to add a splash of color and interest to any room. They come in many varieties, and can be used for interior or exterior walls. Whether you’re interested in a modern or farmhouse style, shiplap will complement most decors.

When it comes to decorative wall panels, one of the best things about shiplap is that it’s a relatively inexpensive option. For a small room, you might even be able to save money by doing it yourself. You can get a nice, smooth finish from simple putty and primer.

The cost of shiplap varies according to the material, accessories and the amount of work needed to complete the project. It’s also dependent on the location where you buy the product. If you’re planning to put it in a basement or a bathroom, the cost might be higher than in a living room or kitchen.

A great way to make shiplap a more affordable option is to choose planks that are more readily available. For example, plywood or pinewood planks are cheap options. These types of materials cost around $5 to $20 per square foot.

Cultured stone

When it comes to choosing a style of stone veneer, you’ll need to take a few factors into account. The cost of these types of wall panels can be substantial. If you’re looking to spruce up your home or business, you’ll want to make sure you choose a material that is durable, fire rated, and will hold up over time.

Natural stone is a great way to enhance the beauty of your space. It can come in a variety of textures and colors, allowing you to choose a style that best suits your needs.

Faux stone is an alternative to natural stone, but can be just as attractive. These wall panels mimic the look of real stone without the risk of catching fire. However, they are not as tough or durable as natural stone.

Cultured stone, on the other hand, is made of concrete or aggregate materials and provides a more realistic appearance. This type of stone is also easier to install. In addition, it can be repaired. Man-made cultured stone offers a wider selection of styles and colors than the natural variety.

Natural stone can be costly to transport. You’ll need to factor in the costs of a truck and a crew to move this kind of stone. Plus, you’ll need to invest in a good adhesive. Lastly, you’ll need to consider the complexity of your project.

Solid surface

When choosing decorative wall panels, there are several different factors that will affect the overall cost. These include the type of panel, the material and the design.

The most expensive types of decorative paneling are solid wood. Solid oak panelling costs between PS300 and $400 per square metre. This type of paneling is usually fitted by a specialist.

Plywood and MDF are among the least expensive. You can also choose fiberglass. Fiberglass is a durable, inexpensive alternative that eliminates grouting problems and leaky seams.

Paneling in decorative style is a great way to add a special touch to your home. There are many styles of paneling available, from traditional to modern. Each is designed to enhance the room’s look.

Wall paneling is a versatile and functional addition to any room. They come in a variety of materials, including plywood, MDF and engineered wood.

For the best results, be sure to use a thick panel. Wood panels can be difficult to install. Before you begin, make sure your wall is clean. If the surface is not sound, a caulking gun may be necessary.

Installation can be a challenging task, especially when dealing with heavy ornate panels. Be sure to follow the manufacturer’s instructions.

Laminated

Decorative laminates are a great alternative to solid wood for interior applications. Laminates are available in a variety of colors, textures, and designs. They are also resistant to scratches and stains. These materials can be used for table tops, cabinets, and shutters.

Decorative laminates are a cost-effective option for decorating your home. However, there are some cost considerations to keep in mind before buying.

For starters, laminated wall panels are available in a variety of colors and patterns. The best thing about them is that they are easy to install. Unlike paint or wallpaper, you won’t have to finish them after application. You can even cut the panels to size.

Decorative laminates are also a cost-effective choice for furniture. Many designers choose textured laminates, which replicate the texture of natural materials. A variety of finishes is available, including metallic, leather, handscraped, and rustic wood. Choosing a design that matches your decor is essential.

Besides the cost of the panels, you should also consider the durability of the material. Generally, high-performance laminates are more durable and resistant to wear and tear.

Decorative laminates are gaining popularity as a flooring material. They are easy to clean, requiring little maintenance. They are an inexpensive alternative to solid wood and offer a variety of decorative options.

Glue-up

Glue-up decorative wall panels aren’t just for the ladies. The best part is that they are actually quite affordable. In fact, you can get one for as little as $20. A high quality glue-up panel is a sure fire way to make your walls look brand new without breaking the bank. It’s also a great way to decorate your home in style. You can choose from several pre-assembled patterns or order custom-sized sheets. To make your life even easier, check out the site’s store-wide sales and discounts. The tiles aren’t just for walls either – they can be used as floors, ceilings, or countertops. Glue-up wall panels come in all colors and styles, from white to blue to black, so you’ll have plenty of choices. They’re made of high quality polyvinyl chloride sheets, so you won’t have to worry about gluing yourself to your own walls! These panels are easy to install and can be used on most any clean surface. Whether you’re looking to improve your home or transform your office, Glue-up decorative wall panels are the perfect solution.

Furring strips

Furring strips are a great way to provide a solid, even surface for many different types of flat materials. They are often used to create level surfaces, but they are also ideal for leveling bowed walls, creating an air space between a masonry wall and plaster, and framing a new addition.

Furring strips are available in various sizes and widths. You can find them at home repair stores. Typically, they are sold in bundles. This makes it easier to select the perfect size for your project.

Furring strips can be installed on a variety of surfaces, including floors, masonry walls, and ceilings. Generally, they are attached to a floor or a wall using a nail or screw.

The most common type of furring strip is made of wood. However, metal is also an option. These strips can be thin and provide an additional level of protection against solar heat and cold.

The typical length of a furring strip is about 1 by 3 inches. There are also shorter options, such as 1-by-two inch strips. Depending on the application, you might want to opt for a narrower or wider strip.

During installation, you should ensure that the furring strip is positioned properly. The strip should be a consistent distance from the perimeter of the wall. In addition, there should be adequate spacing between each furring strip.

Thickness

If you are considering adding a decorative wall panel to your room, consider the thickness of the material you will be using. This can have an impact on the cost of the project.

The most expensive option is solid wood, followed by plywood and MDF. The least expensive are synthetic materials.

Wall panels come in a variety of styles and designs. They can add a distinctive focal point to any room. Using paneling is an excellent way to insulate walls. It can also add texture to a room.

When selecting the right type of decorative wall panels for your home, consider factors such as the size of your room, the style of your room, and your budget. In addition, you will need to decide on a color and design theme for the panels. Depending on the manufacturer, you can get panels that are stainable or unfinished.

Once you have chosen the right panels for your space, you will need to prepare the wall for installation. First, you will need to install new drywall, then lay out the wall with the panels. Panels will need to be set in place and the edges will need to be concealed when the wall is finished.

5 Easy Ways to Make Your Room Look Good

5 Easy Ways to Make Your Room Look Good

5 Easy Ways to Make Your Room Look Good

5 Easy Ways to Make Your Room Look Good

You can make your room look good by changing your color scheme and adding new textures. In fact, it is very easy to do so. With a few simple ideas you can make your room look brand new in no time at all.

Removable wallpaper

If you’re looking to add some color and texture to a room, removable wallpaper is a great way to do it. Not only is it a quick and easy way to give your room a new look, but it’s also a low-cost option.

There are two main types of removable wallpaper. The first is vinyl-based, which is scrubbable and moisture-resistant. However, this type of wallpaper can be cheap and may look less sophisticated than other types of wallpaper. You can also find non-woven, semi-matte material that is easier to clean.

Another type of removable wallpaper is self-adhesive. It features a liner backing that protects the adhesive. A small tab at the top of the panel helps you peel off the backing.

Removable wallpaper is an excellent choice for accent walls or for rental apartments. Unlike traditional wallpaper, removable wallpaper requires no prep, so it is a quick, hassle-free way to change a room.

Whether you are looking for a simple leafy pattern or a more ornate floral print, you’ll find a design that fits your style. These styles are available in a variety of colors and textures.

In addition to the wide array of designs, removable wallpaper comes in different thicknesses. Depending on what you’re trying to accomplish, you may want to go with a more delicate, matte finish or with a thicker, more durable material.

If you are unsure about the amount of wallpaper you will need, it’s a good idea to order more than you think you will need. Be sure to measure your room, and double check to ensure you are getting enough to complete the job.

Some removable wallpaper can smell while it’s in your home. If this is the case, you’ll need to use a strong cleaner to remove the odor.

Adding texture

Texture plays an important role in interior design. It is used to add visual interest, dimension, and warmth to a room. And you don’t have to be a designer to incorporate texture into your home.

There are a few different places to add texture. You can add it to your floors, furniture, or accessories. But it can be tough to figure out exactly how much texture to include.

Some of the best textures to include are the ones that play well with others. For instance, you can include a wood floor and a rug, or you can incorporate a rough wooden chair into your design scheme.

Another way to make a room look good is to add a little bit of scale. When using a lot of texture, a small light in a dark corner can cast a lot of shadows on the wall.

Using a large variety of textiles in a room can also add a lot of textural interest. Textiles can be found in throw pillows, window treatments, bedding, and even upholstery.

To add the best texture to your space, be sure to use a variety of shades and tones of the same color. This can help accentuate certain pieces of furniture or art, and give you a multi-sensory feel.

Adding texture can also include architectural elements. Adding architectural elements such as a mirror or a sculpted glass lamp base can be a great way to add textural impact to a room.

Whether you’re a design aficionado or just looking to freshen up your home, adding texture is a great idea. Not only can it bring dimension and visual interest to your room, it can also create a warm and cosy feeling.

Adding color

Color can do wonders for a room. It can make a boring wall interesting, or it can set the mood. One of the best ways to incorporate color into a space is to mix and match your furnishings with a variety of neutrals. For example, if you have a white sofa, try introducing a bright tangerine lamp or two into the mix.

In the same vein, if you have a room that’s lacking in personality, try adding a few touches of green to the mix. A few planters and succulents can add a fresh new element to your decor.

Tossing in a couple of colorful throw pillows is also a surefire way to add some zest to your abode. If you have the space, consider a runner as well. They add some much-needed color and style to your living room, and they are easy to keep clean.

Adding the correct colors to a room will not only add color, but it will make the space feel larger and more spacious. This can be accomplished with a little bit of paint or a peel and stick wallpaper. However, if you’re not a fan of paint, a wallpaper may be the best bet.

While you’re at it, add a few lamps, a few decorative pieces, and a few throw pillows. The last thing you want is to have a room that looks drab and empty. By keeping the smallest of details in mind, you’ll be surprised by the results. Using a combination of contrasting and complementary colors will yield a room that feels like it has been freshly painted.

One of the best ways to add color to a room is to use a colorful rug. The different textures will add a lot of depth and interest to your space.

Changing up bedding

Changing up bedding is the easiest way to refresh your bedroom. It’s a simple process that can have a significant impact.

First, you’ll want to decide on a theme. You can either choose a solid color or a patterned one. Both can give your room a trendy hotel look.

Then, choose a new duvet. Many duvets are double-sided. A lighter colored duvet can be used for summer and a heavier one for winter.

Another great way to change up your bedding is by using throws. Throws can add texture to your bed, as well as warmth. Also, you can change out the pillows, too.

You can also create a color scheme. These can include bright colors, neutrals, or pastels. Be sure to check out a few paint swatches before you make your purchase.

Lastly, consider adding artwork. This can really help tie the rest of the design together. Choose a piece that suits your personality.

If you aren’t into painting, you can still make changes to your room with some new window treatments. Rearranging furniture can also help to bring more light into the room.

If you want to get more creative, you can add a decorative rug. Decorative rugs are easy to move and can add color and warmth to your bedroom.

Changing up bedding is a simple and affordable way to give your room a fresh, new look. And with just a few dollars, you’ll see a huge impact.

Whether you’re ready to change up your bedding or not, try some of these tips for updating your bedroom this season. By making these small changes, you can transform your entire room into something new.

Adding window dressings

It’s important to find the right window dressings for your home to make it look good. There are many options available. Some are functional and some are just decorative. The best options are those that are cost effective and provide both light and privacy. They can be customized to fit your needs.

Using a curtain or blind to block the sunlight can help you maintain a healthy balance between privacy and light. The right curtain can also add style to your home. For example, pencil pleat curtains are great for pared back living room layouts. You can hang them from a rod or pole and a simple set of hooks.

If you want to create a focal point, try hanging curtains in layers. This is particularly handy for bedroom windows. Each layer of curtains adds a different dimension and helps create the illusion of a bigger room.

If you have a small apartment or house, you might be wondering how to maximize the space. One option is to install roller shades. These are simple to operate and allow you to control how much sunlight enters the room. Other options include pelmets and shades. Pelmets can be upholstered to match your drapes or painted to match your walls.

One of the most important factors to consider when choosing a window covering is the quality of the material. Quality fabric can help keep you warm and cool. In addition, you might want to consider a pelmet or shade for insulation. Lastly, you can add mirrors to help create the illusion of extra square footage.

Choosing the right window dressings is the first step to creating a stylish and functional home. The best window coverings will protect you from the sun’s glare and provide privacy, while adding to the overall decor of your home.

Discover the Advantages of Using PVC Foil in Your Home Renovation Plans

Discover the Advantages of Using PVC Foil in Your Home Renovation Plans

Discover the Advantages of Using PVC Foil in Your Home Renovation Plans

Discover the Advantages of Using PVC Foil in Your Home Renovation Plans

Discover the Advantages of Using PVC Foil in Your Home Renovation Plans

PVC Foil is a great product to use in home renovation plans. Not only is it easy to install and a cost-effective option for plumbing, but it is also durable and flexible, making it the perfect choice for a variety of applications.

Regular PVC piping

Using regular PVC piping in home renovation plans is relatively inexpensive. It’s lightweight, easy to work with, and doesn’t corrode. In addition, it is durable and can last for years. Choosing the right material is important.

There are several different types of PVC piping materials. Each has its own advantages and disadvantages. These include the ability to be flexible, corrosion resistance, and sizing options.

The best material for a home water supply system depends on the specific needs of the home. For example, galvanized steel pipe is an effective water supply material, but it can be expensive to install.

Polyvinyl chloride (PVC) is an affordable option, but it is not a great choice for hot water. While it’s a lightweight material, it doesn’t have the ability to handle the higher temperatures that a water heater uses.

PEX is another plastic material that is suitable for a variety of plumbing applications. This is one of the most cost-effective options available, and it is also the most flexible.

Another alternative is copper pipe, which has been around for nearly 70 years. Copper pipes are strong and compatible with a wide variety of fittings. They are often used in commercial applications, including fire sprinkler systems.

A third option is flexible pipe, which is ideal for tight spaces. The downside is that it can be expensive and not permitted inside floors.

If you have questions about the best materials for your piping system, talk to your local plumber. He’ll be able to help you make an informed decision.

Other things to consider are cost and local building codes. Choosing the right material is a key factor in ensuring the long-term performance of your piping.

Flexible PVC

If you are planning to renovate your house, you might be wondering what material is best for your project. One of the most popular choices is flexible PVC. This material is durable and can be recycled easily.

Flexible PVC is usually used as flooring. However, it can also be used in other applications such as electrical wire insulation. The material is extremely versatile and has a wide range of uses. It is an affordable alternative to rubber.

In addition to being a good insulator, PVC is also very durable. This makes it ideal for a number of industrial and residential applications. Besides, the material is available in various thicknesses.

Flexible PVC can be molded and formed into many shapes and sizes. Plasticisers are added to make the material soft and bendable.

The material is also fire-retardant and can prevent the propagation of flames in the event of a fire. Additionally, it is resistant to corrosion, and its lead content is very low.

Many companies use this material in their construction projects because of its affordability and sustainability. Besides, it is easy to install and can be recycled.

Another great thing about flexible PVC is that it is a versatile replacement for rubber. This material can be found in various types of rolls, sheets, and foils. These products are used in a variety of different industries, including automotive and electrical.

Some of the most common colors for PVC foils are gray and black. However, specialty colors are also available. For example, red and blue foils are often used for decorative purposes.

Flexible PVC is a very cost-effective material, and it is suitable for a variety of home renovation plans. Among the most notable advantages are its good impact strength and tear resistance, which ensures that it will last a long time.

Insulation

PVC foil is a versatile, low-cost material with impressive properties. It is also relatively easy to install. With all of its features, PVC foil makes a great addition to your home renovation plans.

PVC foil is also good for the environment. PVC is recyclable, making it a wise choice for those who wish to reduce their carbon footprint. In addition, PVC is non-toxic, meaning it is safe to use.

Using PVC in your home renovation plans is a smart move, especially if you are looking to reduce your energy bills. Aside from the fact that PVC is a long-lasting material, it is also a good conductor of electricity.

There are several types of PVC to choose from, and each one has its own set of benefits. For example, flexible PVC is an excellent alternative to rubber and is often used for floors.

PVC foil is also known to be durable and impact resistant. However, PVC does not have all of the good qualities of a true plastic. The best way to ensure you get the most from your investment is to follow the manufacturer’s recommendations when selecting a product.

Another useful home insulation option is the radiant barrier. This type of insulation provides a radiant barrier to keep your attic and floors warm. You can find this insulation in rolls or as loose-fill insulation.

Lastly, you may want to consider using PVC film. These are available in a variety of sizes and colors. Although they do not come with the same high impact strength of their solid counterparts, they are an efficient way to insulate your home.

Choosing the right insulation can make a big difference in your home improvement plans. From preventing moisture from forming to slowing heat transfer, it’s best to select the right product for your needs.

Conductivity

When looking for a good home improvement project to do, you may have a difficult time narrowing down your choices. PVC foil is a great choice for a variety of reasons. It has many cool features, and is also durable and cost effective.

For instance, it can be used to improve the overall aesthetics of a room while making it easier for you to clean and maintain. Using PVC in your home improvement projects can be a smart move because of its eco-friendliness. Similarly, it can help to save on energy costs. If you are planning on renovating your home, there are several state rebates for environmentally friendly improvements.

Another reason to consider using PVC is its excellent tear resistance. Not only is PVC an impressive material, it is also highly recyclable. This makes it a good choice for home remodeling, as well as cabling and pipe work.

In terms of material properties, PVC is a thermoplastic polymer. Typically, it is used to make floor coverings and pipes. However, it can be used to make electrical wire insulation as well.

The best part about using PVC is its long lifespan. It is a durable material, and it is highly resistant to rodents. Also, it is not affected by UV light, moisture or atmospheric pollution. Therefore, it is ideal for outdoor applications.

You may want to check out some of the other types of PVC available. Some of these include flexible PVC, which can be used to make a useful substitute for rubber. Alternatively, you can get some great ideas from specialty heating stores. There are even rebates on certain items, such as insulation.

Ultimately, PVC foil is a cost-effective option that can be incorporated into your home improvement plans. Using it to its full potential can make a big difference in your life.

Durability

PVC foil is an inexpensive and durable material that can help you improve your home. It has excellent impact strength, durability, and tear resistance. In addition, it is easy to clean and is recyclable. You can find it in different sizes, shapes, and colors.

PVC is a thermoplastic polymer that can be made flexible or rigid. It is widely used in construction, flooring, and plumbing applications. However, it can also be used for a variety of consumer products. These include ducting, roofing materials, cabling, and energy efficient windows.

When choosing a type of insulation for your home, you need to consider the climate of your location. The right insulation can save you a lot of money on energy bills.

PVC is a great choice for insulation. It has good impact and tensile strength and is resistant to chemicals and alkalis. Moreover, it is resistant to microbiological organisms in sewerage systems.

As a result, it is ideal for electrical wiring in your home. Some types of PVC are highly conductive.

PVC is also resistant to damage from rodents and termites. This makes it a great alternative to other material options. Additionally, PVC is a durable material that can be easily installed and recycled.

PVC can be found in a variety of shapes and colors. Most of the time, it is used for interior applications. For example, it is commonly used in the manufacture of doors. There are specialty PVC foils available that are colored red, silver, and other bright colors.

PVC is also a good option for insulation in electrical wires. Depending on your home’s climate, you may need to install a barrier to prevent moisture from seeping into your walls.

Which PVC film is best for wooden furniture

Which PVC film is best for wooden furniture?

Which PVC film is best for wooden furniture?

Which PVC film is best for wooden furniture

Choosing PVC film for wooden furniture will usually consider the following aspects:

Pattern

Usually, wooden furniture prefers wood grain PVC film. If you are renovating furniture and the style remains unchanged, choose a wood grain pattern that matches the overall style of the furniture, so that the overall style of the furniture will not change much.

If you want to change the furniture style, choose other wood textures, such as oak, maple, walnut, etc. In addition, there are other textures, such as marble, pattern, solid color, etc.

Film thickness

For general furniture, a thickness of 0.1mm to 0.3mm is sufficient. However, for some furniture that is frequently used or easily worn, the wear resistance of the film within this thickness range may not meet the wear resistance requirements of the furniture, so consider choosing a thicker PVC film.

Surface treatment

  • Matte: Matte is suitable for simple, low-key styles. It can reduce reflections and help create a soft visual effect and atmosphere.
  • High gloss: On the contrary, high gloss can enhance brightness and reflection, which helps to improve the brightness and spaciousness of the space. It is very suitable for spaces that need more light and look wider.

Wear resistance

  • Vacuum PVC film has good wear resistance and is generally used for irregularly shaped furniture or door panel surfaces to ensure that furniture and doors will be difficult to scratch in daily use.
  • PVC lamination film is usually used for general furniture, such as desktops and dressing tables. It has moderate wear resistance and is suitable for wear during daily household use.
  • Self-adhesive PVC film is often used by DIY enthusiasts or used for walls to change the wall style or atmosphere. It has low wear resistance.

Therefore, if only the wear resistance is considered: if wooden furniture does not require high wear resistance, then both vacuum blister film and PVC Lamination Film can be considered. If the wear resistance of wooden furniture is high, choose vacuum blister PVC film.

wooden furniture

Adhesion

  • The vacuum PVC film is tightly combined with the substrate through the vacuum blister process can be stably attached to the surface of wooden furniture without falling off, and has a relatively high adhesion.
  • PVC lamination film is attached to the surface of furniture through hot pressing or adhesive and has good adhesion, but is not as good as vacuum blister PVC film.
  • Self-adhesive PVC film is combined with the surface of furniture through its adhesive layer and has good adhesion. However, if the surface is not properly treated or after a long time, the adhesion will decrease, which may cause the problem of warping.

Therefore, from the perspective of adhesion alone, it is recommended to use vacuum blister PVC film for wooden furniture, so that the film is tightly attached to the surface of wooden furniture, and it is not easy to have problems such as warping and hollowing, and the adhesion effect lasts longer than the other two types of films.

Easy to clean

  • The non-porous surface of PVC lamination film can effectively resist liquid penetration into the film, and the smooth surface makes it difficult for liquid to be absorbed, making it easy to clean. This film is usually used on flat furniture surfaces, it is not easy to hide dust, and basic stains and dust can be easily removed.
  • The cleaning performance of printed self-adhesive PVC film is also relatively good. Its surface smoothness and structure are similar to those of PVC lamination film, so the cleaning performance is not much different.
  • The cleaning performance of Vacuum PVC Film is not much different from the other two films, but this film is usually used for furniture that is frequently used and has complex shapes. Irregular surfaces will easily accumulate dust, especially in small gaps, and normal cleaning tools will find it difficult to enter this gap to clean the dust. The more complex the furniture surface, the more area needs to be cleaned, and the more difficult it is to clean.

Difficulty of operation

  • The operation of printed self-adhesive PVC film is the simplest among several types of PVC films. Just tear off the adhesive backing paper, then stick the PVC film on the furniture, start compacting from the middle, and remove the air.
  • PVC lamination film requires a laminating machine or hot pressing tool for construction, but it is usually operated on a flat or simple furniture surface, which is more difficult than self-adhesive film.
  • Vacuum PVC film requires a vacuum forming machine for construction operation to tightly fit the film to the furniture surface, and the possibility of complex furniture shapes is much greater, which requires operation requirements. This operation is a little more complicated and requires certain equipment support.

Summary:

PVC films for wooden furniture can be selected from 0.1mm to 0.3mm thick high-gloss or matte wood grain PVC films. As for which type of PVC foil, choose the most suitable one based on what performance you value.

Because no matter which type of PVC film, not all performances are the best. Generally speaking, vacuum blister PVC film has the best wear resistance and adsorption, but it is more difficult to operate.