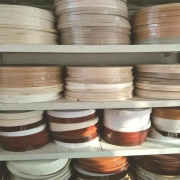
How Does Edgebanding Work

How Does Edgebanding Work?

Edgebanding can be used to protect a wood edge, which can make it less likely to splinter or crack. The way it works is that it is made from plastic or veneer that is glued to the edge of the wood.

Veneer

Usually used as a protective cover for the edges of veneered panels, edgebanding can add a touch of elegance to any surface. In addition to offering a smooth finish, it adds durability to a finished panel. It can be used in a number of applications, including office furniture, retail fixtures and countertops.

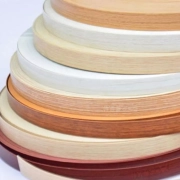
Edgebanding veneer is available in several different finishes and sizes. It can be layered for a clean, solid wood look or dyed to match the color of a particular wood panel. The thickness of the veneer can range from 0.8mm to 2mm. This depends on the type of material and the grade of the wood veneer.

Depending on the application, edgebanding can be made from reconstituted veneer sheets or real wood veneer. In order to achieve the best result, it is recommended that you choose a quality veneer. These types of veneers have consistent colors and grain patterns, and are free of defects.

Edgebanding can be applied with a heat gun or household iron. If you need a stronger adhesive, you can buy a pressure-sensitive adhesive. You can also apply a hot-melt glue. However, you should be careful not to use glue that can melt at high temperatures.

Wood veneer edge bands are available in thick multi-layers and single-layers. They are ideal for straight-line or contour-radius applications.

Qisheng produces their veneer edgebanding in a variety of widths and lengths. Some of their products include finger joints, which are made by die cutting finger layouts in veneer. Their finger joint products are carefully matched and expertly sanded.

플라스틱

The most common plastic used in furniture is polyvinyl chloride, which is not only durable but also offers excellent processing characteristics. These attributes have led to the growth of the furniture manufacturing industry.

Plastic edge banding comes in a wide variety of colours, materials and shapes. It can be used on both residential and office furniture. Using PVC edge banding will give your laminated shelves or melamine cabinets a sturdy finish and a high-quality appearance.

PVC Edge Banding is a flexible and durable product, especially for those pieces with rounded edges. It provides a flawless finish and is easy to install. In fact, it is the perfect choice for decorative surfaces.

There are two main types of PVC edge banding. One is thermoplastic, which is manufactured through an extrusion process. This type is available in a wide range of thicknesses and colours, making it an ideal match for most solid colours.

The other is a newer type, called ABS. This is a more eco-friendly material, which is often referred to as the greener product. Among the many advantages of using this material is that it has a heat-sensing adhesive, which is a key component of a good bond.

You can find all of these items in a variety of sizes and finishes at your local Cabinetmaker Warehouse. As with most items we carry, we will always be happy to help you make the right selection. We can even ship same day to save you time.

The best part about our edgebanding is that we have a wide variety of choices. Whether you are looking for a straight edge or something a bit more complicated, we can get it done for you.

Hot-melt glue

Using hot-melt glue for edgebanding is an affordable and versatile option that is ideal for most applications. The adhesive creates a strong, flexible bond that reduces the risk of peeling or delamination. It is also versatile and easy to work with.

Chinese market has a wide variety of hot melt adhesives available. These include filler and non-filler types, as well as a variety of viscosities. They are suitable for a variety of applications, from manual to automated production.

PUR (polyurethane) based hot-melt adhesives are resistant to moisture and cleaning agents. They have excellent adhesion to a variety of substrates, including solid wood and primed HPL. However, they cannot be re-melted.

Polyesters have a narrow melting temperature range, and can be blended with a variety of additives. This allows them to have high crystallinity. Additionally, they can be used alone.

High performance polyurethane based hot-melts are resistant to both moisture and high temperatures. They are also fast drying and provide a strong, long lasting bond. They can be applied to a variety of materials, including melamine, veneer, and solid wood.

EVA (ethylene vinyl acetate) based hot-melts are an affordable, multi-purpose adhesive. Their low density and high adhesion strength make them a perfect choice for manual and semi-automatic edge-banding applications. Both clear and translucent grades are available, as are natural and transparent colours.

Hot-melt adhesives can be re-melted repeatedly, allowing for a more secure bond. However, they should not be stored in areas with high humidity or temperatures above 120o F. Also, they should not be mixed with other adhesives.

In addition, it is important to use proper ventilation around the adhesive machine. The fumes produced by the glue can be a health hazard.

Preparing the wood

Edge banding is a technique that is used to seal the edges of raw wood boards, providing a more finished look. It also adds strength and durability to the piece.

When looking for edgebanding, there are different materials, finishes, and widths. Some are better than others. For example, you can get edge bands for exotic species, or you can find edge bands in various thicknesses. You might even want to consider a veneer tape instead.

A good rule of thumb is that plywood is a good choice. But you need to make sure that you cut it to the correct size. In addition, make sure that the edges are straight. If you have dados and rabbets in the board, it will be difficult to apply edge banding.

One way to do this is to use a router bit. This will allow you to create a more precise cut. Next, sand the edges with a sanding block. Try to be careful not to go too deep as you can damage the plywood.

Using the right tools can make your job easy. For instance, you can use a chisel and mallet to make clean cuts. Alternatively, you can use a FastCap trimmer from Woodcraft. Or you can just use a utility knife.

However, before you begin cutting, you should know that the glue needs to be heated before it will bond properly with the wood. You can do this by using an iron. Make sure that you do not iron on the same spot over and over.

The best cut is the one that is made by sliding the trimmer in the direction of the grain. Once you have made your cut, be sure to scrape off the excess glue.

Applying the edgebanding

Edge banding is used to finish the edges of plywood, particleboard, and other wooden boards. It may be applied with adhesive or by making a groove in the wood. The banding is then trimmed flush with the leading and trailing edges. This type of finish is often used to create a beautiful, more finished look.

Edgebanding tape is made from a variety of materials. Some are solid wood, while others are a thin strip of veneer. Both types can be made to match the color of the wood.

In addition to making the surface of a board look better, edge banding also provides a barrier against moisture. If you plan to install edgebanding, make sure to prepare your substrate well. You can apply plastic laminate to the front of the substrate before routing the edge.

Edgebanding is usually applied using an edgebanding machine. This type of equipment is typically expensive and takes up a lot of floor space. It is usually not used in smaller applications. When selecting a machine, you need to consider how large of a job you have in mind.

A typical edgebanding tape is made from a semi-rigid polyvinylchloride. It is also possible to find tapes based on ABS or polyolefins, but these require special primers. These primers can improve the adhesion of the tape to the edge of the board.

After applying the strip to the board, you can store it until you are ready to use it. You can also apply heat to the strip, which can increase the adhesion.

To get started, you’ll need to cut a piece of 3/4″ substrate to overhang the cabinet front and back. Once you’ve done that, you can start the process of applying the edgebanding.

PVC Edge Banding - A Home Improvement Project For the DIY'er!

PVC Edge Banding – A Home Improvement Project For the DIY’er!

If you have decided to build your own house and you want to make sure it’s the most perfect possible, one of the first things you’ll need to do is put up PVC Edge Banding. It can make a huge difference in the appearance and feel of your room, and you’ll be surprised at how easy it is!

Contact adhesives

Contact adhesives for PVC edge banding tape come in a variety of choices. However, it is important to apply them correctly to ensure a quality bond. Choosing the wrong type of glue can lead to a failed project. Therefore, you must know what options are available and how to choose the best one for your needs.

The most common type of hot-melt edge banding glue is EVA, or ethylene vinyl acetate. It is easy to apply, affordable and forms a strong bond. It is also very resistant to moisture and cleaning agents.

Another option is polyurethane (PUR). It is very durable and forms a strong bond quickly. You can tint it to match the color of your material. This is especially useful if you are installing a laminated board.

Polyamide hot-melt glues are tough and hold up well in laundry cycles. They are used extensively in the textile industry. These glues can be brittle at low temperatures. They are also fire-retardant.

The next most commonly used option for edge banding is a polyurethane reactive adhesive. While it takes longer to cure, it offers a strong bond. There are a few drawbacks to this type of glue, though. Some types require 24 hours to complete a full cure.

Polyvinyl chloride (PVC) is a plastic polymer that is the third most widely manufactured synthetic polymer in the world. It is used in applications such as furniture, doors, and pipes. It is available in rigid or flexible forms.

Edgebanding is a process that creates trim around unfinished edges of wood, metal, or other material. It creates a durable finish that gives a nice, high-end look. Various materials are used for edgebanding, including melamine, a laminated MDF core.

When applying contact adhesives for PVC edge banding, make sure that you apply them at the right temperature. If you do not, the glue may not adhere to the PVC. In addition, it is a good idea to cut away excess edge banding.

Using the wrong glue can lead to a failed edgebanding project. Always use gloves, and avoid exposing yourself to excessive heat and oxygen.

Trim

PVC edge banding may not be for everyone but it does come with some perks. For starters, it is very easy to install. There are even products out there that let you choose from a range of pre-glued materials to get the job done quickly and cheaply. You’ll also be pleased to know that it’s chlorine-free and environmentally friendly. Unlike other materials, it will not crack or break, which makes it ideal for high-traffic areas like kitchens and bathrooms. Moreover, it’s very easy to clean, and the smooth finish will make your new furniture look just as good as it did the day you bought it.

In addition to the standard red oak, you can also choose from an assortment of exotic woods. These include Asian and African species. The aforementioned material has a relatively low cost, but you’ll probably want to spend a bit more for something more exotic.

To do the job properly, you’ll need a suitable machine. Some brands offer a combination tool and gluing system, while others require a special machine to do the job. One of the best is the STA-Titan. It will cost you about $350, but you can expect to get the job done in a fraction of the time.

Another option is to get professional help. This can be a great option if you have a big project to get done or if you’re just in a hurry. A professional installer will make sure your PVC edge banding trip is installed correctly, and it will be a hassle free process. Plus, the best part about working with professionals is that you won’t have to deal with all the dust and grime of DIY!

One of the most impressive tidbits you’ll learn is that edge banding can be used to cover three quarters of an inch of wood. To make things easier, you can buy it in a variety of sizes and colors. It’s also available in wood-backed variants. Using edge banding is a fun and easy way to update your kitchen or bathroom, and it will pay off for years to come.

DIY vs professional

There is a reason that PVC edge band is considered an elite status among the cabinet and furniture fraternity. Aside from the fact that it is highly durable and slick to boot, it has a plethora of aforementioned advantages. From the aforementioned ease of installation to the aforementioned cost of ownership, PVC edge banding arguably represents a winning home improvement strategy. With the right tools and a healthy dose of awe, you could be on your way to a more refined home in no time at all. That’s a tall order, but it’s one you can certainly address if you know where to look. The right tools are the key to a squeaky clean home, and you’re sure to be rewarded with a long list of happy occupants. So what are you waiting for? Put a notch on your belt and get started on your next home improvement project today. Or, better yet, hire a pro to take care of it for you. After all, no one likes to do their own work! Thankfully, there is an excellent selection of quality, low-cost vetted professionals in your hood.
Make sure each side of a piece of wood matches

If you are considering adding PVC edge band tape to your home, there are several different ways to go about it. It’s easy to apply. There are no complicated tools to learn, and it’s not too hard to remove. In addition, it provides a superior look and is scratch resistant. Whether you’re working on a wood countertop, a door, or a piece of furniture, you can make a huge difference with edge banding.

Edge banding is a material used to cover the exposed sides of a piece of plywood, particleboard, or other wood. This helps provide a durable finish and allows it to be painted. Edge banding can also be used to hide unfinished edges. For example, cabinet shelves can have rough edges, or a piece of plywood might have been moved and the edge is not in a good state. Once you add edge banding, the plywood will look like a solid piece of wood.

It is a cheap way to improve the look of your wood project. Although edge banding can be applied to any surface, it’s best to trim it off the edge. You can use a utility knife or a router to do this. Be careful when you are trimming. Make sure you keep it level and don’t cut it too deep.

PVC edge banding can be applied manually with just a few simple steps. You can even apply it to a piece of melamine or laminated board. Just be careful not to apply it to a semi-gloss finish.

Depending on how you apply the edge banding, you can get a beautiful, long-lasting result. If you’re looking for a quick, inexpensive home improvement project, consider using PVC edge banding. It’s easy to apply, it’s scratch-resistant, and it comes with hot-melt adhesive. Plus, it’s easy to trim and trim off, so you can make it as customized as you want. With all these reasons, it’s no wonder that DIY’ers love it! Try it for yourself! And if you do, don’t forget to take a picture and share it with us!

Why Using PVC Edge Banding On the Furniture Board

Why Using PVC Edge Banding On the Furniture Board

One of the most common questions asked about PVC edge banding is how to install it, and it’s really easy. In fact, it’s so easy, you can do it in just one day. However, there are some pros and cons to using this type of product. This article will look at a few of them, so read on to find out what you should know about using this product.

It’s easy to work with

PVC edge banding is a great option for your woodworking projects. It is easy to install and offers a high quality finish. With the right care, you can create beautiful and unique pieces with PVC edge banding.

When choosing PVC, you should also consider its impact resistance. PVC is a thermoplastic that is resistant to heat and impact. You should keep in mind that PVC edge banding should be stored in an area where temperatures are low. This will help prevent any warping or discoloration of the material.

If you want to ensure that you are getting the most out of your PVC edge banding, you should always follow the manufacturer’s instructions. This will make sure that your project lasts as long as possible.

Whether you are installing edge banding for your furniture or for a commercial job, you should use the proper tools. These tools include a heat gun, a hand iron, and adhesive.

Using the right materials and working tools will prevent common mistakes. Moreover, it will ensure that your project results are as expected. To get a better idea of the tools that you need, talk to a professional. They can provide insight on how to use the tool and what materials are best for your specific projects.

Before you start installing your PVC edge banding, you should take the time to properly measure your project. Proper measurements will allow you to avoid gaps and misalignments. Also, you will need to make sure that you select the correct width.

Once you have measured your project and chosen the correct tools, you can begin applying your PVC edge banding. After you have finished applying it, you can paint the edge to enhance the look. However, you should remember that paint can chip off around curves.

Depending on your project’s size, you may need more than one piece of PVC edge banding. Installing multiple pieces will require more time.

While it is possible to apply PVC edge banding yourself, you should always consult a professional for advice. Their experience and expertise will allow you to achieve the results you desire.

It’s faster to install

When it comes to edge banding, you need to choose the best material for the job. For example, if you are working on furniture, choose a durable type of PVC. This is the cheapest option and can be easily installed. Using PVC edge banding also adds value to the piece of furniture.

The best part about using PVC is that it can be used to cover the edges of various types of materials. Some of the popular ones are plastic, wood veneer, or wood. It is also possible to use it on curved surfaces.

PVC edge banding is easy to cut and install. The materials are impermeable, which means you won’t have to worry about water leaking. However, it is important to choose the right thickness. You can find different widths in the market. If you are looking to get a good deal, try buying in bulk.

PVC edge banding can be easily applied using a hot melt adhesive. However, it is important to note that this kind of glue can’t be directly heated by an iron. Nevertheless, it does have an impressive look.

Besides, PVC has other advantages. It has a fire-resistance and an impact-resistance. In addition, it’s also able to resist UV light and chemical agents. Thus, it’s ideal for outdoor furniture.

Lastly, it is also possible to get a seamless finish with PVC lipping. These are made by cutting a sheet of PVC into thin pieces. After that, the sheet is attached with a glue like those found in plywood. Depending on your requirements, you can purchase the rolls in 200 meters.

Choosing the right PVC edge banding can give your project a unique and high-quality look. Whether you are doing a residential or commercial project, this is the best way to keep your edge from nicking or cracking.

So, it isn’t a surprise that many people consider PVC edge banding the best choice. Whether it’s for a piece of furniture, a patio set, or a deck, it will be a great solution. Moreover, it’s an inexpensive solution that will last for years.

It’s available in a variety of colors and finishes

PVC edge banding can add value to your furniture and create a professional look. It is easily installed and maintained, and can be used with a variety of materials.

It can be a very durable material, and is resistant to fading and chipping. It can be painted, but you must be careful when painting around curves. Painting will not cover the edge completely, and will often leave gaps and uneven coverage.

The best way to protect your edge banding is to seal it from moisture and extreme temperatures. This will keep it in good condition, and will ensure a long life for your project. Keep it away from direct sunlight, and store it in a cool, dark place. You can also choose to protect it with a UV-protection coating, which will prevent discoloration over time.

PVC edgebanding is available in a wide range of colors, from white to black. If you are not sure which colors to choose, you can consult a professional. They will be able to give you advice on how to install the materials.

Some common types of materials used for edge banding are polypropylene, melamine, and polyvinyl chloride. Each has its own benefits. Melamine has an extremely durable finish, while polypropylene is easy to clean. Choosing the right material for your application will help you achieve a beautiful finish that will last for many years.

Depending on your needs, you can find PVC edgebanding in different widths and thicknesses. A thin edge band may not provide as much protection as a thicker one, but it can be easier to apply.

If you are planning to install the PVC edgebanding yourself, you can use a trim router or a hand iron to shape it. In addition, you can buy specific adhesives to secure the edges. However, you should be careful to follow the manufacturer’s instructions.

When installing the PVC edgebanding, it is important to use a tool that has a sharp blade. Using a hot air gun can damage the material. Before starting, you should read all instructions and guidelines.

It’s sensitive to high temperatures

PVC edge banding is a thermoplastic resin which is used for the edges of furniture. It has excellent adhesive strength, flexibility and can be finished with pigments. The adhesive used for PVC edge banding is hot melt glue.

Edge banding is used for many different applications. It is most commonly applied to plywood edges. However, it can also be used for other materials.

For a smooth finish, most woodworking professionals prefer solid wood edge strips. These are durable and match any colour.

They are also easy to fix and refinish.

Alternatively, you can also use PVC edge banding. This is an environmentally friendly option. It can be recycled and is suitable for chlorine-free furniture. You can also get various colours and glossy finishes.

When deciding on an edge banding material, you will need to consider the type of furniture you will be using. Depending on the material, you might need to use an adhesive.

If you need a glue that can be remelted, you can use EVA. But be careful. Because it is sensitive to heat, it might not be the best choice for high-traffic areas.

Using a high-temperature hot melt adhesive is not a good idea on worktops or furniture. This is because the heat can break the bond. There are low-melt adhesives, which are better suited for softer materials.

Having enough glue can also be a factor. Make sure you have enough to cover the whole width of the banding. Also, ensure that the edges are clean and free of dust. Dirt can prevent the bond from being complete.

A successful edgebanding project needs the right combination of temperature and pressure. It would help if you also were careful to avoid burning the edge banding.

Unlike other types of edging, PVC is not resistant to high heat. Although it can be recycled, it takes a long time to decompose.

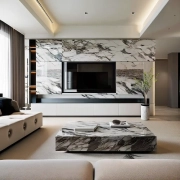
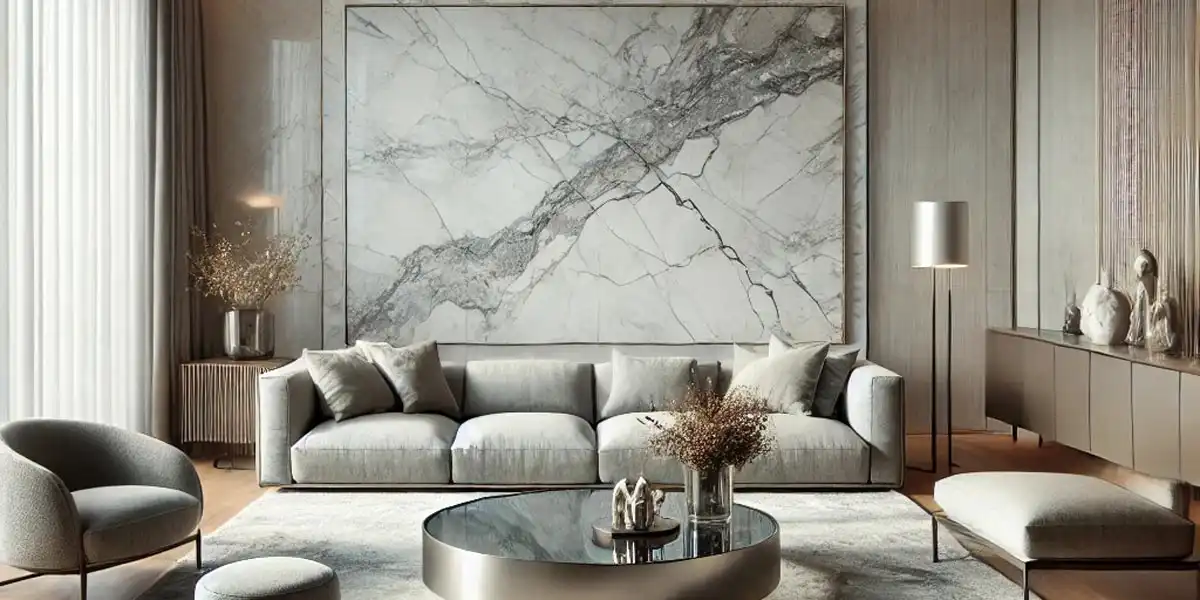
Living room with stone-textured TV cabinet and coffee table

Which Furniture is Suitable for Marble Grained PVC Film?

Which Furniture Is Suitable for Marble Grained PVC Film?

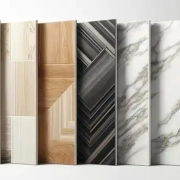
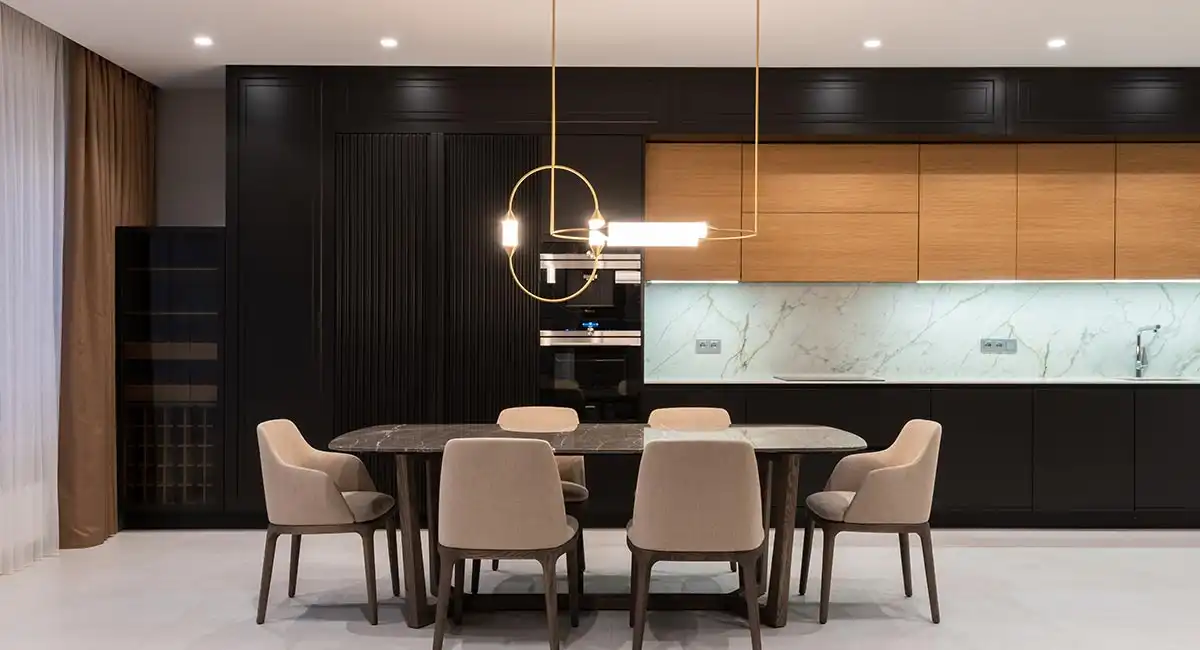
TV cabinets, dining tables, kitchen countertops, office desks, coffee tables, and other furniture are very suitable for stone-grained PVC film decoration because their style, function, and other requirements are highly compatible with the characteristics of stone texture. Stone grain can enhance the natural broadness and steady beauty of this furniture, making it rich in layers.

Style fit

The texture of stone grain is complex and varied. Even the same stone grain type will have different subtleties, giving furniture unique beauty. The stone itself is simple and has a long survival time. After years of wind and rain, it has a sense of heaviness of time precipitation, giving furniture a timeless and heavy atmosphere.

In palaces and mansions, marble granite and other stones are often used for decoration because they are luxurious and can give furniture a noble and elegant image. Furniture such as TV cabinets, coffee tables, and dining tables, which are more decorative than functional, need luxurious stone grains to decorate and enhance the luxury of the home.

Office desks used to be decorated with PVC film to create a stable, professional, powerful, and simple style. Stone is hard and stable, giving furniture a sense of stability and professionalism.

The tones of stone grain are usually cold colors such as gray, white, and black. These cold colors can bring a calm, rational, and simple atmosphere to the space, suitable for office desks, cabinets, or kitchen countertops.

Other furniture, such as wardrobes or desks, tends to be more functional and suitable for warmer, softer, and more serene styles. In contrast, marble patterns may seem out of place in such environments, disrupting the overall aesthetic and potentially affecting the functionality of the furniture. For example, a stone pattern may look too heavy on wardrobe doors, clashing with the cozy atmosphere of a bedroom.

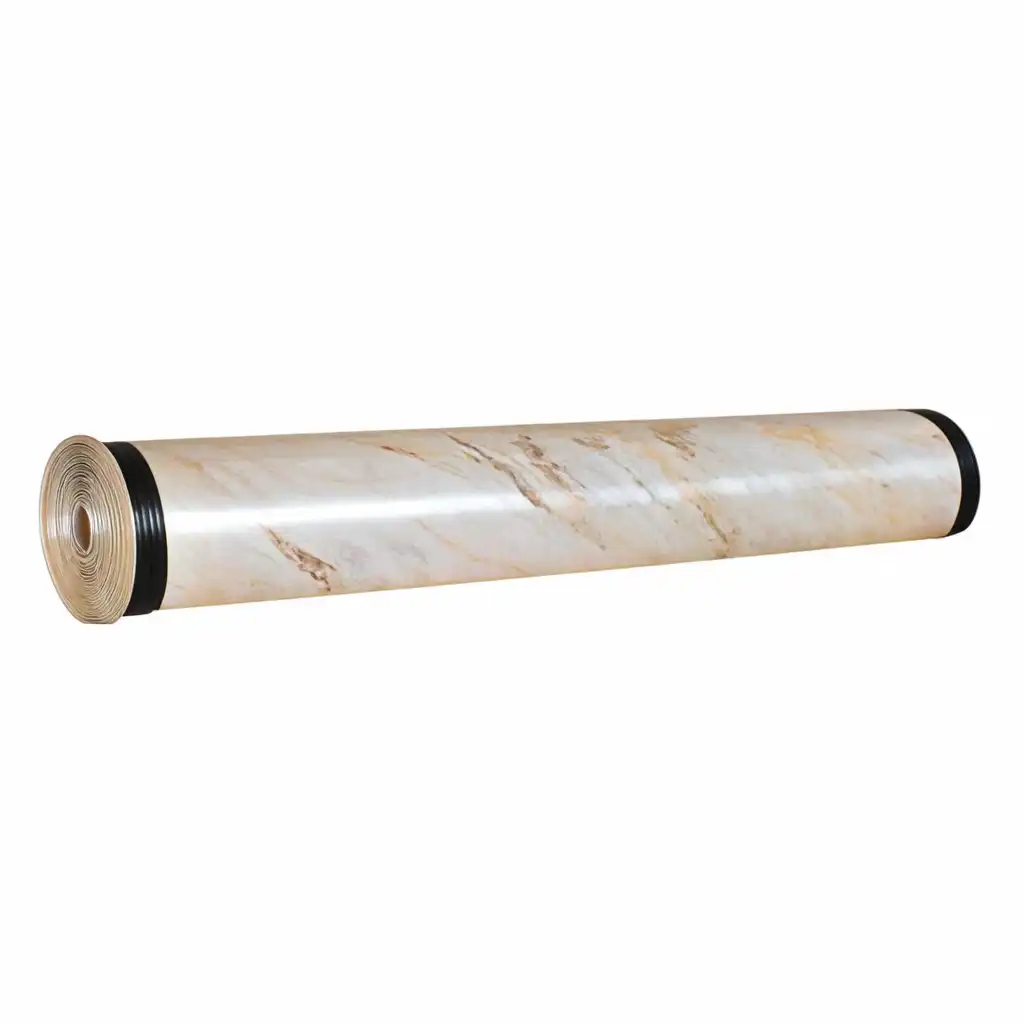
A roll of stone-textured PVC film

Functionality

For furniture like TV cabinets and coffee tables, where decoration is more important than functionality and often serve as focal points in living rooms, marble patterns add a touch of elegance and refinement. The intricate textures and transitions of color enhance the overall aesthetic of the space.

The simplicity and purity of stone patterns complement minimalist styles and harmonize well with other materials like metal or glass in modern interior design. This enhances the rational beauty of the space and adds a luxurious quality, serving as a decorative feature.

Headboards, however, are more functional than decorative. The cold tones and complex texture of stone patterns might create a feeling of coldness and discomfort, which is not conducive to a warm, comfortable sleeping environment.

The depth and layering of stone patterns may not be fully displayed on furniture like wardrobes, potentially making them look monotonous or burdensome, which can detract from the user’s experience and emotions while using the furniture.

Impact on Space

Stone patterns feature depth and variation, and in spacious, well-lit areas like living rooms, they can enhance the furniture’s surface, creating a sense of depth and dimension and preventing the space from appearing too flat or monotonous.

White or lighter-toned stone patterns, such as white marble, reflect light well off the furniture’s surface, making it appear brighter and more spacious. This is especially useful in small or poorly lit spaces, where light-colored stone-patterned PVC film can make the space more open and bright.

Stone patterns blend a natural ruggedness with modern, refined textures, acting as a balancing element in various interior styles. Whether in a minimalist contemporary setting or a classic luxurious one, stone patterns can integrate seamlessly, creating a visually harmonious and unified space.

However, in a bedroom, furniture like nightstands and wardrobes decorated with strong stone patterns may clash with the overall soft atmosphere, disrupting the harmony of the space and potentially causing visual discomfort.

합판에 PVC 엣지를 적용하는 방법

합판에 PVC 엣지를 적용하는 방법

합판은 매우 아름다울 수 있지만 작업하기 어려울 수 있습니다. 테이블이나 다른 나무 가구를 만들고 싶다면 작업의 가장자리를 보호하기 위해 엣지 밴딩을 사용하는 것을 고려할 수 있습니다. 이것은 합판의 가장자리를 덮고 보호하는 좋은 방법이 될 수 있지만 다리미로 합판 시트에 엣지 밴딩을 적용하는 것보다 훨씬 더 많은 노동력이 필요합니다.

엣지밴딩은 목재의 가장자리를 덮고 보호하는 데 사용되는 재료입니다.

합판 엣지 밴딩 합판을 긁힘이나 기타 손상으로부터 보호하는 데 사용되는 일종의 가장자리 트림입니다. 또한 합판 내부가 휘는 것을 방지합니다.

엣지 밴드는 합판, 파티클보드 및 기타 목재 유형의 가장자리에 적용할 수 있습니다. 다양한 폭과 두께로 제공됩니다. 손으로 또는 기계를 사용하여 적용할 수 있습니다. 적절한 폭을 선택하는 것은 덮을 목재의 디자인과 유형에 따라 달라집니다.

패널의 가장자리를 합판으로 덮을 계획이라면 내구성과 유연성이 있는 가장자리 밴드를 선택하는 것이 가장 좋습니다. 멜라민, 폴리프로필렌 또는 폴리염화비닐 등 다양한 소재 중에서 선택할 수 있습니다.

가장 흔한 엣지 밴딩 소재는 폴리염화비닐입니다. 저렴하고 적용하기 쉽습니다. 그러나 다른 소재만큼 내구성이 좋지 않습니다.

아크릴로니트릴 부타디엔 스티렌(ABS)도 인기 있는 선택입니다. 습기와 화학 물질에 강합니다. 이 가장자리 밴드는 열에 강하고 목재 표면과 어울리도록 색칠할 수 있습니다.

폴리프로필렌 엣지 밴드는 매우 내구성이 뛰어납니다. 습기에 취약한 프로젝트에 적합합니다. 저렴하지만 그다지 튼튼하지 않으므로 야외 가구에는 사용하지 않는 것이 좋습니다.

더 얇고 유연한 상업용 엣지 밴드도 있습니다. 곡선 또는 둥근 모서리에 사용할 수 있습니다. 핫멜트 접착제로 만들어져 내구성과 유연성이 더 뛰어납니다.

엣지 밴딩은 접착하거나 스테이플러로 고정할 수 있습니다. 접착제는 폴리비닐 아세테이트, PVA 또는 브랜드 접착제일 수 있습니다. 일반적으로 접착제는 투명하고 방수가 됩니다.

또 다른 옵션은 다리미로 엣지 밴딩을 적용하는 것입니다. 하지만 보드 끝이 아닌 모서리에 적용해야 합니다. 다리미를 사용하면 엣지 밴딩이 합판에 제대로 붙습니다.

합판의 가장자리를 마무리하려면 베니어를 적용할 수 있습니다. 그러나 저렴한 합판으로 작업하는 경우 문제가 될 수 있습니다. 목재 베니어는 단단한 목재와 같은 고품질의 외관을 가지고 있지 않습니다.

다림질로 가장자리를 붙이는 것보다 시간이 더 많이 걸립니다.

목공 작업에 장식적인 마감을 추가하고 싶을 때, 엣지 밴딩은 최고의 솔루션 중 하나입니다. 설치하기 쉽고 다양한 스타일과 소재로 제공됩니다.

엣지 밴딩은 일반적으로 핫멜트 접착제로 적용됩니다. 그러나 이러한 유형의 접착제를 제거하는 것은 어려울 수 있습니다. 어떤 경우에는 전문 솔루션이 필요할 수 있습니다. 이런 일이 발생하면 보드가 손상될 수 있습니다.

또 다른 방법은 엣지 밴딩에 다리미를 사용하는 것입니다. 이것은 합판 엣지를 마무리하는 좋은 방법입니다. 이 방법은 내열성이 낮은 재료에도 사용할 수 있습니다. 적용하려면 엣지 밴딩의 한쪽 끝에 예열된 다리미를 놓습니다. 다리미를 천천히 움직여 접착제를 가열합니다. 아직 뜨거울 때 밴딩의 측면 가장자리를 기판에 다시 누릅니다.

더 저렴한 옵션으로 일반 옷 다리미를 사용해 보세요. 하지만 수평을 유지해야 합니다. 또한 다리미 밑판이 뜨거워지지 않는지 확인하세요.

엣지 밴딩을 적용하는 또 다른 쉬운 방법은 손으로 하는 것입니다. 그러나 이 방법은 시간이 많이 걸릴 수 있습니다. 명백한 시간적 요인 외에도 접착을 위해 기판을 준비해야 합니다. 시작하기 전에 면 천으로 엣지 밴딩을 보호해야 합니다.

또는, 화가용 테이프를 사용하여 접착제를 제자리에 고정할 수 있습니다. 이 방법은 특히 길고 곡선이 있는 부분에 중요합니다.

가장 좋은 테이프는 PVC입니다. 내구성에도 불구하고 이 소재는 가장 환경 친화적인 선택은 아닙니다.

사실, 저렴한 다리미를 사서 직접 엣지 밴딩을 만드는 것이 더 저렴할 수도 있습니다. 할인점이나 중고품 매장에서 다리미를 살 수 있습니다. 면 세팅이 있는 다리미를 구입하세요.

또한 베니어 톱이나 히트락 접착제를 사용하여 다양한 유형의 엣지 밴딩을 부착할 수 있습니다. 프로젝트 크기에 따라 엣지 밴딩을 필요한 크기로 자를 수 있습니다. 또는 기계로 엣지 밴딩을 적용할 수 있습니다.

사용하는 엣지 밴딩의 종류에 따라 원하는 길이와 두께로 다듬을 수도 있습니다. 하지만 양쪽에 반 인치 테두리를 남겨두세요.

적용하는 동안 모서리를 둥글게 하지 마십시오.

합판 PVC 에징을 적용할 때 최종 결과가 성공적이 되도록 하기 위해 해야 할 몇 가지 사항이 있습니다. 이를 수행하는 가장 쉬운 방법 중 하나는 모서리를 둥글게 하지 않는 것입니다. 이렇게 하면 훨씬 더 매끄러운 마감을 만들 수 있습니다. 이는 특히 프로젝트에 곡선 모서리가 있는 경우에 해당합니다.

최종 결과물을 매끈하게 만드는 것 외에도 합판의 내부 층을 보호해야 합니다. 이를 위해 보드를 계획하고 평평하게 만들어야 합니다.

이렇게 하려면 사포가 필요합니다. 사포는 샌딩 블록이나 나무 블록에 감싼 사포로 살 수 있습니다. 사포는 약간 각도를 이루어 아래로 문지르는 방식으로 감아야 합니다.

또한 화가용 테이프도 필요합니다. 이것은 접착제를 제자리에 고정하는 데 도움이 됩니다. 이러한 테이프 중 일부는 250피트 롤로 제공되며, 이는 전체 작업을 덮기에 충분합니다.

마지막으로, 가장자리 밴딩을 해야 합니다. 이것은 합판 가장자리에 다림질하거나 붙일 수 있습니다. 적절한 크기로 잘라야 합니다. 각 면에 최소 0.5인치의 여분을 두는 것이 중요합니다.

가장 효율적인 방법은 미리 자른 목재 베니어나 단단한 나무 조각을 사용하는 것입니다. 이것들은 작업하기 쉽고 가장자리가 더 보기 좋습니다. 그러나 다리미를 사용하여 적용하는 경우 목재 베니어가 타지 않도록 주의해야 합니다.

몇 가지 다른 요령을 사용하면 최상의 최종 결과를 얻는 데 도움이 됩니다. 이러한 요령 중 하나는 날카로운 칼을 사용하여 초과분을 다듬는 것입니다. 또 다른 요령은 유틸리티 블레이드로 가장자리를 연마하는 것입니다.

마지막으로, 뜨거운 다리미를 한 자리에 너무 오래 두어서는 안 된다는 것을 알아두는 것이 좋습니다. 뜨거운 다리미는 나무를 태워서 접착제 일부가 옷으로 옮겨갈 수 있습니다.

또한 모서리의 거품이 생긴 부분을 고치기 위해 작은 구멍을 뚫는 것도 고려할 수 있습니다.

나만의 엣지 밴딩을 만들어보세요

엣지 밴딩은 합판에 매끄러운 표면을 만드는 데 도움이 될 수 있습니다. 그러나 벗겨지는 것을 방지하기 위해 밴딩을 올바르게 적용해야 합니다. 적용 방법은 여러 가지가 있습니다. 일부는 간단하고 다른 일부는 더 복잡합니다.

첫 번째 방법에서는 뜨거운 다리미, 나무 조각, 접착제가 필요합니다. 롤러를 사용하여 에지 밴딩을 합판에 눌러 넣을 수도 있습니다. 이것은 목재 베니어 에지 밴딩을 적용하는 가장 효과적인 방법입니다.

두 번째 방법은 폐목재로 가장자리 밴딩을 누르는 것입니다. 이렇게 하면 접착제가 나무에 스며들게 됩니다. 가장자리만이 아니라 평평한 표면 전체에서 작업하는 것이 중요합니다.

마지막으로 날카로운 트리머로 엣지 밴딩을 적용할 수 있습니다. 그러나 올바른 모양을 얻는 것이 더 어렵습니다. 좋은 트리머가 없으면 유틸리티 나이프로 엣지 밴딩을 간단히 잘라낼 수 있습니다.

합판을 필요한 크기로 자른 후, 이제 엣지 밴딩 공정을 시작할 수 있습니다. 합판의 뒷면에서 시작하여 엣지 밴딩을 그 위로 펼칩니다. 모서리에서 엣지 밴딩을 약간 겹쳐야 합니다. 합판의 가장자리를 따라 앞면에 도달할 때까지 계속합니다.

엣지 밴딩 공정이 끝나면 샌더를 사용하여 남아 있는 고르지 않은 부분을 제거할 수 있습니다. 특히 프로젝트를 정면에서 볼 경우 이 작업이 중요합니다.

엣지 밴딩은 여러 가지 소재로 구입할 수 있습니다. 다양한 색상과 크기를 찾을 수 있습니다. 합판에 맞는 적절한 두께를 선택해야 합니다.

엣지 밴딩은 합판의 모든 모서리에 적용할 수 있습니다. 사전 접착된 밴딩을 찾을 수 있으며, 이를 통해 프로세스를 빠르고 쉽게 수행할 수 있습니다. 또는 직접 접착제를 적용할 수도 있습니다.

뜨거운 다리미 방법을 사용하는 것 외에도 양면 테이프를 사용하여 엣지 밴딩을 적용할 수 있습니다. 그러나 접착제가 결합되도록 테이프를 접어야 합니다.

4 Benefits of Edge Banding in Plywood

4 Benefits of Edge Banding in Plywood

4 Benefits of Edge Banding in Plywood

If you have been considering the use of plywood in your home, you may be interested in the benefits of edge banding. Not only is it a cost effective way to add a little polish and refinement to an inexpensive piece of wood, but it can also prevent interior plywood from warping.

Prevents interior plywood from warping

If you’re planning to store interior plywood, there are ways to keep it in good shape. For starters, try storing it in a horizontal manner. This prevents uneven shrinking that could cause the wood to warp.

Another approach is to put a water-resistant sealant on the face of the board. Keeping it in a dry, cool and shaded location is also helpful. You may even want to use a dehumidifier to counter humid environments.

Warping is a problem that plagues all wooden products. Not only can it be dangerous, but it can affect the structural stability of the building materials.

The simplest way to avoid this is to store plywood in a flat, dry and cool location. However, it’s not always easy to do this in a small shop.

Plywood is made up of many layers. The layers can warp together if one is improperly stored. A common trick is to store it vertically, but this can be problematic when it comes to small shops.

To avoid the problem, store your lumber in a cool, dry and shaded location. Also, avoid storing wood that’s wet. It will swell and expand when it absorbs moisture from the air. That’s not necessarily a bad thing, but it can cause your underlying sheets to move.

The best way to avoid a problem is to purchase from a trusted source. Whether it’s a home improvement center or a lumber supplier, make sure you’re buying from a reputable company.

One way to prevent interior plywood from warping is to measure its moisture content. You can do this by taking a relative humidity reading. While the air temperature does not have any influence on its moisture level, it can help you find out what you’re dealing with.

Adds polish and refinement to an inexpensive piece of wood

Edge banding is a great way to give your furniture a more finished look. It can add polish and refinement to an inexpensive piece of wood. Depending on the style of your home, you can choose from different looks and colors.

There are two basic types of edge banding. The first is the straight edge banding. This type is typically more expensive. However, it gives you a more finished, professional look.

You can also choose curved edge banding. Curved bands are less common, but they can give your furniture a stylish look.

When choosing edge banding, make sure that it is compatible with your existing pieces. In addition, the finish can be painted or stained to match the rest of your home.

Edge banding can also help your projects last longer. It is durable and can withstand regular knocks and bumps. Also, it can protect your furniture from the elements.

Edge banding is available in many materials. It can be made from solid wood, veneer, and even acrylic. If you want a more polished look, you can buy edge banding that has been pre-stained.

During the application process, you can use a sander. You can use a random orbital sander to speed up the process. After the edges are smoothed, you can use a trimmer tool to cut off any excess veneer.

Edge banding can be applied with glue, nails, or screws. Using painter’s tape can keep the adhesive in place. Painter’s tape is especially useful if you have longer, curved areas.

Glues used to make edge banding are usually hot-melt adhesives. PVA glue dries clear and is water-resistant. PA glue is tough under low temperatures.

Provides a smooth finish

Edge banding is a useful and worthwhile way to add a little refinement to your plywood projects. It also makes the edge of your plywood look like it’s been cut into a solid board.

One of the best things about using edge banding is that it comes in a variety of shapes and sizes. This means that you can match the finish to your project’s wood surface.

The first thing to do is to select the correct kind of edge banding. PVC is one of the most common materials, but it can be made from other sources. You can also find edge banding made from exotic hardwoods. Some are even pre-sanded. Using the right edge banding will ensure that your finished piece is as durable as it is beautiful.

The next step is to use a utility knife to trim the edges of the plywood. This will not only make the edge look smooth, but will also hide the plywood’s corner joints.

After you’ve trimmed the edges, you can start ironing the edge banding to your plywood. Keep in mind that you don’t want to do this too soon, as it can burn the wood. Also, don’t sit the iron on one spot. Move back and forth over a section of about two feet. Doing this will allow the adhesive to warm up, which will make it more effective.

Before applying the edge banding, you can use sandpaper to buff out the corners. Use 120-220 grit sandpaper. You can also use a sharp block plane to achieve a micro-beveled edge.

When you’re ready to apply the edge banding, make sure to start with the least visible side of the plywood. This will allow you to create a strong bond with the edge banding and plywood.

Is suitable for curved surfaces and rounded edges

If you want to add some decorative touch to your plywood project, then edge banding is a good choice. This type of edging is durable, easy to install, and can be applied to all sorts of curved surfaces. However, there are some things to keep in mind before you get started.

In general, you should use the same width and thickness of edge banding as the plywood you are using. There are some types of edge banding that are not as flexible as others, so it’s important to choose the right one for the job. Using the wrong kind can lead to serious maintenance problems.

Edge banding is available in different colors, sizes, and species. It can be purchased in rolls or in glue-less strips. You can also paint it to match your plywood’s finish.

Edge banding is great for covering up unfinished edges on plywood and other wood surfaces. When you are building furniture, the edge of the board can sometimes be very visible, so it is best to cover it. Whether you are finishing a cabinet, a desk, or a bookcase, you can give your project a polished look by adding edge banding.

You can apply edge banding by hand or by machine. Both options require cutting the plywood and the edge banding to the right size.

Using the right edge banding can protect your wood from moisture and wear. The most popular choices include laminated and polypropylene. Laminated edge banding is more flexible, so it is better suited for curved surfaces. Polypropylene is less susceptible to moisture and is easier to clean.

While the most common type of edge banding is made from polypropylene, there are many other options, including melamine and ABS. Melamine is especially good because it is UV light resistant.
Is durable

Whether you’re building a new cabinet or adding an extra touch to your furniture, plywood edge banding is an excellent choice for adding a durable finish. There are several different types to choose from, including solid wood, veneer, and PVC. It’s important to decide what type of material you want your banding to be made of, because it can affect how well it will hold up.

Solid wood edge banding is highly durable, and will resist chipping and warping. It is available in a variety of thicknesses and can be stained to match your project. You can also find edge bands in exotic species.

Edge banding is usually applied to the edges of plywood, but can be used on other materials as well. Whether you need a solid wood, metal, or melamine edge banding, you can find it in a range of colors and widths.

If you’re looking for a cheap, durable, and easy to apply solution for edge banding, you should consider PVC. PVC can be used on nearly any kind of wood. And the banding is easily cut to curve the edges.

Depending on what you’re looking for, you can also buy edge banding that’s been pre-glued. This means you’ll be able to use a nail gun or stapler to install the edge banding. However, this can be time consuming.

Hot-melt glue edge banding is another popular option. This is less expensive than the other two options, and it is more convenient to use. However, it isn’t as strong or durable. Unless you’re working with a heavy-duty application, it isn’t recommended for outdoor furniture.

Iron-on edge banding is another way to add a durable finish to your plywood project. To apply it, you’ll first need to use a hot-melt adhesive on the back of a piece of wood veneer. After the adhesive has cooled, you can then iron it onto the surface.

합판용 PVC 엣지 밴딩 - 알아야 할 10가지

합판용 PVC 엣지 밴딩 - 알아야 할 10가지

합판용 PVC 엣지 밴딩 - 알아야 할 10가지

합판용 PVC 엣지 밴딩 - 알아야 할 10가지

당신이 사용을 생각하고 있다면 PVC 엣지 밴딩 합판 프로젝트를 위해 알아야 할 몇 가지 사항이 있습니다. 이러한 팁은 프로젝트에 가장 적합한 선택을 하는 데 도움이 될 것입니다.

설치 중

PVC 엣지 밴딩은 합판이나 단단한 목재 패널의 가장자리를 보호하는 좋은 방법입니다. 내구성이 뛰어나고, 관리하기 쉽고, 저렴합니다. 필요에 맞는 다양한 색상과 마감재를 찾을 수 있습니다.

PVC 엣지 밴딩 트림을 제대로 설치하려면 올바른 도구를 사용해야 합니다. 잘못된 도구를 사용하면 제품이 조기에 손상될 수 있습니다. 또한 열을 너무 많이 사용하면 접착제가 충분히 강하지 않을 수 있습니다. 전문가의 올바른 도움을 받으면 최상의 결과를 얻을 수 있습니다.

먼저, 밴딩의 가장자리를 크기에 맞게 잘라야 합니다. 좋은 가위로 할 수 있습니다. 더 매끈한 가장자리를 원하면 특수한 가장자리 밴딩 도구를 사용해야 합니다.

다음으로, 밴딩의 뒷면에 좋은 접착제를 바르세요. 접촉 시멘트나 핫멜트 접착제를 사용할 수 있습니다. 접착제는 합판의 전체 가장자리에 바르세요. 접착제가 충분하지 않으면 더 추가해야 할 수도 있습니다.

접착제가 마르면 가장자리 밴딩을 부착하기 시작할 수 있습니다. 합판의 뒷면에서 시작하여 앞으로 이동합니다. 다른 면으로 작업을 계속합니다.

모든 밴딩이 제자리에 놓인 후에는 가장자리를 보호 테이프로 감싸야 합니다. 이렇게 하면 PVC 가장자리 밴딩이 습기로부터 밀봉됩니다. 건조하고 시원한 곳에 보관하세요.

또한 모서리를 매끈하게 다듬기 위해 브레이어가 필요합니다. 더 나은 마무리를 위해 롤링 도구를 사용할 수 있습니다.

PVC 엣지 밴딩을 설치할 때는 지침을 읽는 것이 중요합니다. 지침은 매우 구체적일 수 있으며 제품 설치 방법에 대한 팁을 포함할 수 있습니다. 지침을 읽을 시간을 가지면 일반적인 실수를 피하는 데 도움이 됩니다.

PVC 엣지 밴딩을 처음 설치한다면 전문가와 상의하는 것이 좋습니다. 그들의 전문성은 올바른 도구를 사용하고 설치가 순조롭게 진행되도록 보장할 수 있습니다. 전문가는 또한 필요한 다양한 재료, 기술 및 도구에 대한 자세한 정보를 제공할 수 있습니다.

귀하의 요구 사항에 맞는 올바른 엣지 밴딩 식별

PVC 엣지 밴딩은 합판 프로젝트에 보호와 스타일을 추가하는 간단하고 비용 효율적인 방법입니다. 다양한 두께와 색상으로 제공되어 다양한 용도에 이상적입니다. 그러나 프로젝트에 적합한 두께를 얻는 것이 중요합니다.

몇 가지 요인이 엣지 밴딩의 두께를 결정합니다. 먼저 합판에 적합한 너비를 찾아야 합니다. 이는 프로젝트의 모양과 크기에 따라 달라집니다. 넓은 표면에서 작업하는 경우 더 넓은 엣지 밴딩을 선택해야 합니다. 또는 더 작은 프로젝트에서 작업하는 경우 더 얇은 엣지 밴딩이 필요합니다.

다음으로 PVC 엣지 밴딩 테이프에 적합한 접착제를 선택해야 합니다. 가장 일반적으로 핫멜트 접착제를 사용합니다. 이 유형의 접착제는 홈 인테리어 매장이나 온라인 리테일러에서 찾을 수 있습니다. 또한 접착제가 없는 접착제도 찾을 수 있습니다.

PVC 엣지 밴딩을 선택할 때는 합판에 접착제를 바르기 위해 작업 도구를 사용해야 합니다. 그렇게 하면 일반적인 실수를 방지할 수 있습니다. 또한, 마모에 견딜 만큼 접착력이 강한지 확인할 수 있습니다.

용도에 따라 프라이머를 사용해야 할 수도 있습니다. 이렇게 하면 접착력이 더 좋아집니다. 프라이머를 사용하는 또 다른 장점은 시간이 지남에 따라 변색되는 것을 방지하는 데 도움이 된다는 것입니다.

마지막으로, 엣지 밴딩을 습기와 극한의 온도로부터 보호해야 합니다. PVC는 햇빛에 노출되거나 열에 노출되면 손상될 수 있습니다. 따라서 시원하고 어두운 곳에 보관하는 것이 가장 좋습니다.

올바른 PVC 엣지 밴딩을 선택했으면 제조업체의 지침에 따라 설치하십시오. 주의 깊게 설치하면 재료가 수년간 양호한 상태를 유지할 수 있습니다.

엣지 밴딩은 목재, 플라스틱, 레이저, PET 등 다양한 소재로 만들 수 있습니다. 가장 인기 있는 소재는 PVC와 ABS입니다. 올바른 유형의 소재를 선택하는 것은 어려운 일이 아닙니다. 꼭 둘러보고 필요한 정보를 수집하세요.

엣지 밴딩은 프로젝트를 마무리하는 쉬운 방법이지만, 한계가 없는 것은 아닙니다. 지침을 주의 깊게 읽고 전문가와 상의하여 올바르게 설치하는 방법에 대한 조언을 받으십시오.

풀이

합판 프로젝트에 PVC 엣지 밴딩을 설치했다면, 어떻게 제거해야 할지 궁금할 것입니다. 다행히도, 이 작업은 생각보다 어렵지 않습니다. 중요한 것은 올바른 단계를 밟고 적절한 지침을 따르는 것입니다.

먼저 적절한 도구를 사용해야 합니다. 엣지밴딩 트리머는 과도한 밴딩을 제거하는 데 유용합니다. 마찬가지로, 만능 칼이나 라우터도 도움이 될 수 있습니다. 그러나 이 작업을 시도하기 전에 전문가와 상의하는 것이 좋습니다. 이렇게 하면 프로세스가 순조롭고 안전하게 진행됩니다.

엣지 밴딩을 설치한 후에는 재료를 혹독한 온도에서 멀리 보관해야 합니다. 이렇게 하면 재료가 과도한 습기를 흡수하는 것을 방지할 수 있으며, 이로 인해 제품이 조기에 손상될 수 있습니다.

사용하기 전에 접착제도 확인해야 합니다. 잘못된 종류를 사용하면 보드가 손상될 수 있습니다. 일부 접착제에는 가장자리 밴딩을 변색시킬 수 있는 화학 물질이 있습니다. 고품질 접착제를 사용하거나 전문가와 상의하여 조언을 구하세요.

엣지 밴딩을 적용하기 전에 면적을 제대로 측정했는지 확인해야 합니다. 올바른 측정을 통해 PVC를 올바르게 적용할 수 있습니다.

다양한 종류의 엣지 밴딩이 있습니다. 가장 인기 있는 것은 PVC로 만든 것입니다. 이 유형의 소재를 사용하면 오래 지속되고 내구성 있는 마감을 제공할 수 있습니다. 또한 매우 유연하여 원하는 모양으로 쉽게 구부릴 수 있습니다.

이 외에도 다양한 색상 중에서 선택할 수 있습니다. 선택할 때는 UV 차단 기능을 선택하세요. 이렇게 하면 PVC가 시간이 지나면서 변색되는 것을 방지할 수 있습니다.

마지막으로, 프로젝트를 완료하는 데 걸리는 시간을 고려해야 합니다. 명확한 일정을 갖는 것은 실수를 방지하고 결과를 성공적으로 유지할 수 있습니다.

프로젝트 규모에 따라 추가 도구가 필요할 수 있습니다. 파워 트리머를 선택하든 핸드헬드 아이언을 선택하든 적절한 지침을 따라야 합니다.

궁극적으로 PVC 엣지 밴딩을 제거하는 가장 좋은 방법을 결정하려면 전문가와 상의해야 합니다. 전문가는 가장 효과적인 재료와 기술에 대한 귀중한 통찰력을 제공할 수 있습니다.

적절한 보관

PVC 엣지 밴딩의 적절한 보관은 내구성과 수명에 필수적입니다. 소재를 잘못 보관하면 휘거나 변색될 수 있습니다. 소재를 시원하고 건조한 곳에 보관하면 수명을 보장할 수 있습니다.

PVC 엣지 밴딩은 광범위한 응용 분야에 비용 효율적인 솔루션입니다. 다양한 색상, 모양 및 크기로 제공됩니다.

PVC 엣지 밴딩도 설치하기 쉽습니다. 간단한 핸드 아이언이나 전문 엣지 밴딩 머신을 사용할 수 있습니다. 제품을 설치할 때는 매끄럽고 안전한 결합을 위해 제조업체의 지침을 따라야 합니다.

PVC 엣지 밴딩을 설치할 때는 보호 안경과 장비를 착용해야 합니다. 적절한 도구를 사용하면 일반적인 실수를 예방할 수 있습니다. 또한 올바른 접착제를 사용하면 접착제가 강하고 재료가 제자리에 고정됩니다.

PVC 엣지 밴딩을 직접 설치하든 전문가를 고용하든 손상을 방지하기 위해 지침을 따르는 것이 중요합니다. 작업 구역을 깨끗하고 이물질이 없는 상태로 유지해야 합니다. 열원 근처에서 작업하지 마십시오. 재료가 뜨거워질 수 있으며, 이는 조기에 열화될 수 있습니다.

PVC 엣지 밴딩을 극한의 온도로부터 보호하려면 시원하고 어두운 곳에 보관하는 것이 가장 좋습니다. 또한 먼지와 습기를 피하기 위해 플라스틱으로 포장해야 합니다.

모서리가 휘어져 있다면 하드 롤러가 필요할 수 있습니다. 모서리 밴딩 트리머를 사용할 수 없다면 옷 다리미나 베니어 톱을 사용할 수 있습니다.

엣지 밴딩에는 핫멜트 접착제를 사용할 수도 있습니다. PVC의 종류에 따라 접착제의 온도를 조절하여 균열을 방지해야 합니다. 그러나 가구에는 핫멜트 접착제를 사용해서는 안 됩니다.

UV 차단제를 추가하면 재료의 변색도 방지할 수 있습니다. UV 광선은 프라이머를 손상시킬 수 있습니다. 일부 에징은 UV 광선에 강하지 않으므로 단단히 밀봉된 비닐 봉지에 보관하는 것이 가장 좋습니다.

PVC 엣지 밴딩 스트라이프를 적절히 설치하고 유지 관리하면 프로젝트가 수년간 지속되는 데 도움이 될 수 있습니다. 제품을 닦고 먼지나 때를 제거하세요.

장식용 벽 패널을 사용할 때의 4가지 환경 고려 사항

장식용 벽 패널을 사용할 때의 4가지 환경 고려 사항

장식용 벽 패널을 사용할 때의 4가지 환경 고려 사항

장식용 벽 패널을 사용할 때의 4가지 환경 고려 사항

사용을 고려하고 있다면 장식용 벽 패널 집에서 벽을 걸 때 환경을 고려하는 것이 중요합니다. 특히 어린이 방에 패널을 사용할 계획이라면 더욱 그렇습니다. 무독성 소재의 패널을 사용하면 어린이가 안전하게 놀 수 있는 장소를 확보하는 데 도움이 됩니다.

프탈레이트

프탈레이트는 가소제, 향수, 개인 관리 제품, 가정용 세척제 및 식품 포장에 사용되는 합성, 반휘발성 유기 화합물 그룹입니다. 또한 어린이의 건강에 영향을 미치는 것으로 알려져 있습니다.

소비자 제품 안전법이 도입된 이래로 제조업체는 어린이용 제품에 특정 프탈레이트를 사용하는 것이 금지되었습니다. 프탈레이트는 많은 제품에 사용되지만 건축 자재에서는 아직 규제되지 않았습니다.

중국에서는 프탈레이트가 다양한 합성 장식 재료에서 발견됩니다. 이러한 재료에는 플라스틱 장난감, 연질 폴리머, 벽지 및 PVC 바닥재가 포함됩니다.

어린이는 특히 프탈레이트의 영향에 취약합니다. 이는 오염된 먼지를 섭취할 가능성이 더 높기 때문입니다. 이 때문에 프탈레이트가 한 물체에서 다른 물체로 어떻게 전이되는지 아는 것이 중요합니다.

미국 소비자 제품 안전 위원회(CPSC)는 소비자 제품에서 프탈레이트의 존재를 조사하고 보고해야 합니다. 예를 들어, DEHP가 포함된 장난감은 미국의 장난감 제조업체에서 자발적으로 리콜되었습니다.

발암물질이자 천식 유발물질로 밝혀진 프탈레이트가 몇 가지 있습니다. 그러나 대부분의 프탈레이트는 우려 사항이 낮습니다. 마찬가지로 유럽 연합은 프탈레이트에 대한 경고 라벨을 발행했습니다.

위험 신호를 보낸 최초의 프탈레이트 중 하나는 디-n-옥틸 프탈레이트(DiNP)였습니다. DiNP는 나중에 남성 생식기 선천적 결함과 관련이 있었습니다.

우려를 불러일으킨 또 다른 프탈레이트는 디에틸 프탈레이트(DEHP)였습니다. 설치류 시험에서 정자 수와 남성 생식기 기형과 관련이 있었습니다.

여러 학술 연구와 정책 보고서에서 프탈레이트에 대한 우려를 표명했습니다. 다양한 제품의 프탈레이트에 대한 Prop 65 합의가 여러 건 이루어졌습니다.

Target, Walmart 등도 독성 화학물질을 없애기 위한 이니셔티브를 시작했습니다. 그러나 소비자 제품에 대한 규제 절차는 느립니다.

중금속 안정제

중금속 안정제는 수년 동안 사용되어 왔지만 최근 연구에서는 이것이 여러 건강 위험의 원인이라는 사실을 발견했습니다. 여기에는 신경 발달 문제, 생식 문제, 갑상선 장애 및 암이 포함됩니다. 다행히도 이것이 이야기의 끝이 아닙니다.

일부 제조업체는 장식용 벽 패널의 중금속 위험을 완화하는 방법을 생각해냈습니다. 예를 들어, Morton International은 유기 화합물만을 사용하는 열 안정제 기술인 Advaflex를 개발했습니다. 이 제품은 기존 금속 안정제에 비해 저렴하고 환경 친화적인 대안입니다.

사실, 이 Advaflex 기술은 매우 효과적이어서 필요한 주요 금속 안정제의 양을 최대 75%까지 줄일 수 있습니다. 또한 저농도 금속 카르복실레이트를 포함한 다양한 PVC 첨가제와도 호환됩니다. 게다가 가수분해적으로 안정하고 산화적으로 안전합니다.

Advaflex는 광범위한 응용 분야를 가지고 있지만, 바닥재 및 코팅 필름 산업을 대상으로 합니다. 그럼에도 불구하고, 모든 당사자에게 어필할 만한 비용 효율적인 제품이기도 합니다.

가장 흥미로운 Advaflex 기믹 중 하나는 LM-300 시스템으로, 사용자가 여러 금속 종을 하나의 응집 안정제로 결합할 수 있게 해줍니다. 이 시스템은 Ca/Zn 및 Ba/Zn/P와 함께 사용할 때 특히 효과적입니다.

또 다른 제품은 폴리이소시아누레이트 폼 사이에 끼워진 하드보드 안정제인 Thermolite입니다. 두 제품 모두 물을 흡수하는 데 효과적이지만 폼 버전은 보기 흉한 부기를 유발하는 것으로 알려져 있습니다.

마지막으로, 표준 혼합 금속 안정제를 대체하는 드롭인 제품인 Advaflex LM-2000과 같은 몇 가지 앞서 언급한 Advaflex 기술이 있습니다. 이러한 시스템은 완성된 단열 금속 패널의 성능을 향상시키는 동시에 주요 금속 안정제의 낭비를 최소화하는 좋은 방법입니다.
NFPA 701 내화성 섬유 및 필름에 대한 화재 시험 표준 방법

커튼이나 창문 트리트먼트용 원단을 구매해야 하는 경우 NFPA 701 테스트를 통과했는지 확인하세요. 이 국가 표준은 걸려 있는 직물로 인한 화재로부터 대중을 보호하도록 설계되었습니다.

이 테스트는 12초간 화염에 노출된 후 직물의 발화 저항성을 측정합니다. 결과는 코드 담당자가 창문 처리 및 수직으로 매달린 직물을 포함하는 기타 응용 분야에 사용합니다.

미국에서는 모든 커튼 원단과 천막이 NFPA 701 표준의 요구 사항을 충족해야 합니다. 또한 의도된 용도에 따라 특정 원단에 대한 특정 표준이 있습니다. 여기에는 커튼, 천막, 텐트 및 롤러 셰이드가 포함됩니다.

직물은 사용된 시험 유형에 따라 분류됩니다. 예를 들어, 단일 직물 시트는 소화염 시험에서 시험되고, 접힌 직물은 대화염 시험에서 시험됩니다. 직물은 또한 화학 처리를 통해 CAN/ULC-S109 내화성 직물 및 필름 시험을 통과할 수 있습니다.

NFPA 701 표준의 시험 방법 1과 2는 주로 가연성 물질의 화염 전파를 평가하는 데 맞춰져 있습니다. 여기에는 직물과 플라스틱 필름이 모두 포함됩니다.

테스트 방법 1과 2는 창문 트리트먼트, 커튼 및 기타 수직으로 매달리는 용도에 사용되는 원단의 가연성을 평가하는 데 사용됩니다. 여기에는 비닐 코팅이 된 안감과 원단이 포함됩니다.

한계산소지수(LOI)는 화염을 점화할 수 있는 대기 중 최소 산소량을 측정한 것입니다. 값은 공기의 부피 백분율로 표현됩니다.

여러 주 및 지방 정부는 모든 커튼 원단과 천막이 NFPA 701 표준을 충족하도록 요구하는 규정을 통과시켰습니다. 또한 여러 도시에서는 공공 장소에서 방염 원단에 대한 의무적 요구 사항을 시행했습니다.

유지 보수가 편리합니다

방을 업데이트하고 벽지를 관리하는 번거로움을 피하고 싶다면 장식용 벽 패널을 고려하세요. 장식용 벽 패널은 전선이나 먼지 얼룩과 같은 벽의 결함을 숨기는 데 도움이 되며, 공간에 디자인적 흥미를 더해줍니다.

장식용 벽 패널은 내구성 있는 기질로 만들어졌기 때문에 설치와 청소가 쉽습니다. 그러나 시간이 지남에 따라 마모되고 찢어질 수 있습니다. 장식용 벽 패널의 원래 모양과 느낌을 유지하려면 몇 가지 간단한 팁을 따라야 합니다.

장식용 벽 패널을 보호하는 가장 좋은 방법 중 하나는 습기로부터 멀리하는 것입니다. 물은 라미네이트 마감재가 기질에서 분리되도록 할 수 있습니다. 장식용 벽 패널은 건조하고 시원한 곳에 보관해야 합니다.

패널의 수명을 보장하는 또 다른 방법은 장시간 햇빛에 노출되어 퇴색되지 않도록 하는 것입니다. 장식 마감재에 닿는 빛을 부드럽게 하기 위해 커튼을 추가할 수도 있습니다.

마지막으로, 장식용 벽 패널은 직사광선에 닿지 않는 곳에 보관하세요. 먼지가 쌓이기 쉽기 때문에 정기적으로 먼지를 털어내는 것이 좋습니다.

장식용 벽 패널을 청소하는 가장 쉬운 방법은 부드러운 천에 순한 비누 용액을 사용하는 것입니다. 용액을 균일하게 바르고 깨끗한 천으로 과도한 물을 헹굽니다.

또는, 패브릭으로 덮인 벽 패널이 있는 경우 진공 청소기를 사용하여 먼지를 제거할 수 있습니다. 최대 효과를 위해 보푸라기가 없는 천을 사용하십시오.

마지막으로, 벽 패널 표면에 강한 용제 세척제를 사용하지 마십시오. 이는 패널을 손상시키고 영구적인 자국을 남길 수 있습니다.

건강 위험

다음 리노베이션이나 건물 업그레이드에 새로운 벽지를 설치하는 것을 고려하고 있다면 고려해야 할 세 가지 사항이 있습니다. 가장 큰 세 가지는 석면, 곰팡이 및 미생물 증식, 변색입니다. 이러한 질병에 맞서는 가장 좋은 방법은 시간을 내어 새 벽에 보기 흉한 검은 자국이 있는지 검사하는 것입니다. 마찬가지로 장식 전문가와 전문 디자이너의 조언을 들어야 합니다. 이를 수행하는 가장 좋은 방법은 평판이 좋은 디자이너와 회의 일정을 잡는 것입니다. 한 가지 주의 사항: 빠른 돈을 노리는 디자이너를 조심하세요. 또한, 파렴치한 계약자를 조심하세요.

장식용 벽 패널을 사용하여 전기 또는 배관 기능을 숨길 수 있습니까?

장식용 벽 패널을 사용하여 전기나 배관 시설을 숨길 수 있을까?

장식용 벽 패널을 사용하여 전기나 배관 시설을 숨길 수 있을까?

장식용 벽 패널을 사용하여 전기 또는 배관 기능을 숨길 수 있습니까?

벽을 장식하는 방법을 결정할 때 장식용 벽 패널을 사용하는 것을 고려해 볼 수 있습니다. 이러한 벽 커버링은 가짜 벽돌, 목재 및 재활용 목재를 포함한 다양한 소재로 제공됩니다. 가장 좋은 점은 적용하기 쉽다는 것입니다.

가짜 벽돌

가짜 벽돌 장식 벽 패널은 벽을 더 흥미롭게 만드는 좋은 방법입니다. 또한 설치가 비교적 쉽습니다. 게다가 진짜 벽돌보다 저렴한 대안입니다.

시작하기 전에 작업할 영역을 측정해야 합니다. 그런 다음 수평기를 사용하여 가장 가까운 벽에서 약 48인치 떨어진 수직선을 만듭니다. 수평기나 레이저 수평기를 사용하여 첫 번째 패널 코스의 시작점을 표시합니다.

첫 번째 패널을 기준선에 중앙에 배치하면 부착을 시작할 수 있습니다. 이 단계에서는 벽돌 사이의 조인트를 매끄럽게 하는 데 도움이 되는 조인트 도구가 필요합니다. 특히 단단한 이음새가 필요한 노출된 벽돌의 경우 이 작업이 중요합니다.

마무리할 준비가 되면 새 패널을 제자리에 스테이플러로 고정해야 합니다. 평평한 표면에서 작업해야 패널이 손상될 수 있습니다.

패널의 가짜 벽돌은 일관성이 있어야 합니다. 마치 떠다니는 것처럼 보이지 않게 해야 합니다. 또한 벽돌 사이의 간격도 일관성이 있어야 합니다.

가짜 벽돌에는 두 가지 기본 유형이 있습니다. 얇은 벽돌과 벽돌 베니어입니다. 얇은 벽돌은 전통적인 석조 벽돌과 같은 점토로 만들어집니다. 벽돌 베니어는 다공성이 더 높고 습기를 흡수할 수 있습니다. 그러나 벽돌보다 유지 관리가 쉽습니다.

벽돌 패널이 손상될 가능성이 걱정된다면 건설용 접착제를 사용하여 제자리에 고정하는 것이 좋습니다. 벽돌 사이의 작은 틈새를 채우기 위해 코킹 건을 사용하되 가장자리에 너무 가깝게 접착제를 바르지 않도록 주의하세요.

또는 벽돌을 칠할 수도 있습니다. 질감이 있는 페인트는 결점을 숨기고 벽에 독특한 터치를 더합니다. 하지만 질감이 있는 페인트는 항상 청소하기 쉽지 않으며 외관을 유지하려면 정기적으로 다시 칠해야 합니다.

혀와 홈

텅 앤 그루브 장식용 벽 패널은 집에 독특한 미학을 더하는 좋은 방법입니다. 이 유형의 패널링은 쉬플랩 목재 패널링의 외관과 텅 앤 그루브 방식의 내구성을 결합합니다. 실내 및 실외 벽 모두에 사용할 수 있습니다.

텅 앤 그루브 패널은 여러 가지 다른 소재로 제공됩니다. 일부는 나무로 만들어졌고, 다른 일부는 합성 소재입니다. 소재에 관계없이 모든 집에 개성과 따뜻함을 더해줍니다.

텅앤그루브 벽 패널은 집의 스타일과 어울리도록 칠할 수 있습니다. 또한 습기가 새어 나가는 것을 방지하는 단단한 밀봉을 제공합니다. 이 소재를 설치하는 것은 쉬플랩을 사용하는 것보다 조금 더 복잡할 수 있지만 충분히 쉽습니다.

텅앤그루브 패널을 설치하는 데 드는 비용은 평방 피트당 $4에서 $8까지 다양합니다. 직접 하기로 선택하면 상당한 금액을 절약할 수 있습니다. 게다가, 직접 패널을 설치했다는 만족감을 얻을 수 있습니다.

텅 앤 그루브 패널을 사용하면 벽에 헛간과 같은 소박한 느낌을 줄 수 있습니다. 또한 단열성과 내구성도 더해줍니다. 이러한 유형의 패널을 사용하면 추운 계절에 상당한 양의 에너지를 절약할 수 있습니다.

패널링은 다양한 스타일과 색상으로 제공됩니다. 따뜻하고 자연스러운 룩을 원하든, 더 현대적인 느낌을 원하든, 완벽한 옵션을 찾을 수 있을 것입니다.

직사광선이 많이 드는 방에 텅앤그루브 패널을 설치하려는 경우, 표면을 유해한 자외선으로부터 보호하는 페인트를 선택해야 합니다. 다양한 페인트가 있지만, 패널을 물로부터 보호하기 위해 투명 코팅 실런트를 고려할 수도 있습니다.

하얗게 칠하다

백색 도료로 칠한 장식용 벽 패널은 방치된 배관이나 전기적 기능을 가리는 좋은 방법입니다. 이러한 제품은 집의 원래 벽을 대체하기 위한 것이 아니지만, 실내 디자인에 약간의 클래스를 더해줍니다. 중요한 것은 평판 좋은 공급업체에서 구매하고 프로젝트에 가장 적합한 최고 품질의 제품을 선택하는 것입니다.

시중에는 다양한 종류의 장식용 벽 패널이 판매됩니다. 전통적인 목재 패널링을 선택하거나 가짜 벽돌이나 돌 마감과 같은 보다 현대적인 대안을 선택할 수 있습니다. 집의 미적 감각을 완전히 바꾸고 싶거나 단순히 집에 개성을 더하고 싶든, 귀하의 필요에 맞는 솔루션을 찾을 수 있을 것입니다.

어떤 패널이 집에 가장 잘 맞는지 항상 쉽게 결정할 수는 없지만, 다음 프로젝트를 성공으로 이끄는 몇 가지 간단한 단계가 있습니다. 이러한 팁과 요령을 사용하면 시간, 비용 및 좌절을 줄일 수 있습니다.

재활용 목재

재활용 목재 장식 벽 패널은 모든 방에 스타일을 더할 수 있으며 환경 친화적인 옵션이기도 합니다. 적절한 목재 선택은 극적인 초점이나 더 미묘한 악센트 벽을 만드는 데 도움이 될 수 있습니다.

재활용 목재는 다양한 출처에서 나올 수 있습니다. 헛간, 보트, 창고 또는 상업용 건물에서 찾을 수 있습니다. 그러나 이러한 재료의 품질과 무결성은 크게 다를 수 있습니다. 이러한 재료를 어디에서 찾을 수 있는지 잘 모르겠다면 전문가에게 문의하세요.

재활용 목재는 다양한 종, 크기, 색상으로 찾을 수 있습니다. 목재의 나이에 따라 매듭 구멍과 같은 약간의 결함이 있거나 두께가 약간 고르지 않을 수 있습니다.

일반적으로 이러한 패널은 가볍고 불연성이며 단단한 기질 위에 설치하기 쉽습니다. 4가지 다른 목재 무늬 패턴으로 제공됩니다. 미적 매력 외에도 내구성이 뛰어나고 최소한의 유지 관리가 필요합니다.

재활용 목재 장식용 벽 패널을 설치하기 전에 목재를 사용할 준비를 하십시오. 풍화된 마감을 만들기 위해 목재에 염색을 해야 합니다. 목재의 종류에 따라 매끄러운 마감을 위해 패널링을 샌딩해야 할 수도 있습니다.

설치하는 동안 각 판자 사이에 최소 0.5인치 간격을 두십시오. 또한 판자의 가장자리를 서로 떨어뜨려야 합니다. 이렇게 하면 이음새가 닫히는 것을 방지할 수 있습니다.

재생 또는 새 패널을 선택하든, 패널은 건조하고 시원한 곳에 보관해야 합니다. 설치한 후에는 천으로 패널을 정기적으로 닦아야 합니다. 또한 금속 마감재나 금속 페인트를 사용하지 않도록 주의하세요.

프로젝트에 가장 적합한 소재를 선택하는 데는 시간이 걸릴 수 있습니다. 재활용 목재로 작업하는 데 익숙하지 않다면 전문 목수가 도와줄 수 있습니다. 또는 이미 완성되어 설치할 준비가 된 재활용 또는 새 목재 보드를 구매할 수 있습니다.

떼어내 붙이는 데칼

벗겨 붙이는 데칼은 벽에 약간의 멋을 더하는 완벽한 방법입니다. 설치와 제거가 쉽고, 사실상 모든 테마에 사용할 수 있습니다. 현재 장식에 만족하지 않으면 이미 가지고 있는 데칼을 바꿀 수도 있습니다.

새로운 것을 최대한 활용하려면 벽 스티커, 제대로 적용해야 합니다. 이를 수행하는 가장 좋은 방법은 다음 단계를 따르는 것입니다.

먼저, 벽의 어느 부분을 장식의 초점으로 삼을지 결정하세요. 예를 들어, 침실이나 식당에 악센트 벽을 둘 수 있습니다. 이 결정을 내리면 표면을 샌딩하고 먼지나 흙을 제거해야 합니다. 번거로울 수 있지만, 그럴 만한 가치가 충분히 있습니다. 이 작업이 완료되면 개인 취향에 맞는 방법을 사용하여 데칼을 적용하세요. 스프레이 접착제를 사용하는 것이 가장 좋고, 스퀴지나 스펀지를 사용하여 적용하는 것도 좋습니다.

세부 사항에 정말 까다로운 사람이라면 데칼의 모든 모서리에 같은 절차를 따를 수 있습니다. 특히 위에서 아래로 바르고 모서리에 너무 가깝게 붙이지 않도록 주의하세요. 끈적끈적한 잔여물이 남을 수 있습니다.

고집스러운 데칼을 풀기 위해 헤어드라이어를 사용하는 것도 좋은 생각입니다. 아니면, 특수 키트를 구매할 수도 있습니다. 마지막으로 데칼을 붙이기 전에 과도한 접착제를 씻어내세요. 큰 얼룩 없이 떼어낼 수 있어야 합니다.

껍질을 벗기고 붙이는 데칼은 은행을 털지 않고도 집을 장식할 수 있는 좋은 방법입니다. 쇼핑할 때는 다양한 색상과 크기로 제공되는 고품질 제품을 찾으세요.

PVC 호일이 집 내부 벽과 천장에 이상적인 소재인 이유

PVC 호일이 집 내부 벽과 천장에 이상적인 소재인 이유

PVC 호일이 집 내부 벽과 천장에 이상적인 소재인 이유

PVC 호일이 집 내부 벽과 천장에 이상적인 소재인 이유

집을 더 매력적으로 만들려면 집의 전반적인 모습을 향상시킬 뿐만 아니라 오래 지속되는 재료를 찾고 싶을 것입니다. 집의 내부 벽과 천장에 사용할 수 있는 재료의 종류는 몇 가지 요인에 따라 달라집니다. 여기에는 내구성, 친환경성 및 가격이 포함됩니다.

내구성

PVC 호일은 실내 벽과 천장에 사용할 수 있는 튼튼하고 내구성 있는 소재입니다. 이 유형의 소재는 다양한 질감으로 제공됩니다. 욕실, 주방 및 기타 통행량이 많은 공간에 적합합니다.

다음 프로젝트에 PVC를 선택해야 하는 데에는 여러 가지 이유가 있습니다. 매우 내구성이 뛰어나고 가볍고 청소하기 쉽습니다. 게다가 재활용할 수도 있습니다.

집이나 사무실에 PVC 패널을 설치하려고 하든, 그것은 실용적이고 비용 효율적인 선택입니다. 또한 장식 디자인, 프린트, 모자이크 패턴 및 짠 이미지로 벽 패널을 사용자 정의할 수 있습니다.

PVC는 매우 내구성이 뛰어나고 내화성이 있으며 유지 관리가 쉽습니다. 곰팡이가 생기지 않고 물을 흡수하지 않습니다. 새로 설치해야 하는 프로젝트가 있는 경우 PVC 패널을 쉽게 설치하고 분해할 수 있습니다.

또한, 전기 절연성이 좋은 특정 유형의 PVC가 있습니다. 이들은 종종 가정 및 기타 건물에서 전력 분배 및 배선에 사용됩니다.

PVC는 또한 광범위한 응용 분야에 사용할 수 있는 다재다능한 폴리머입니다. 이 소재는 의료 기기, 약물 전달 시스템, 수술 도구를 포함한 여러 제품에서 찾을 수 있습니다.

PVC 산업은 세계 경제에 기여하는 산업입니다. 많은 사람들에게 안전한 작업 환경과 취업 기회를 제공합니다.

PVC를 사용하는 또 다른 장점은 완전히 재활용이 가능하다는 것입니다. 또한 수명이 긴 것으로도 알려져 있습니다. 선택하는 PVC 유형에 따라 최대 100년까지 지속될 수 있습니다.

일부 경쟁 소재는 PVC에 비해 환경적으로 유리하다고 주장하지만, 이러한 주장은 대개 오해나 편향된 의견에 근거합니다.

친환경성

PVC 호일은 내구성이 뛰어나고 단열성이 뛰어난 소재입니다. 내부 벽 그리고 천장. 그것은 큰 충격 강도와 좋은 수증기 차단을 제공합니다.

사용 중 집에서 사용하는 PVC 호일 에너지와 돈을 절약하는 좋은 방법입니다. 또한 환경을 보호하는 데에도 기여하게 될 것입니다.

PVC는 내구성이 뛰어나고 가벼운 폴리머입니다. 선택한 유형에 따라 수년간 지속될 것으로 예상할 수 있습니다. 그리고 재활용이 가능합니다.

PVC의 또 다른 장점은 가볍고 설치하기 쉽다는 것입니다. 이로 인해 주택의 전기 배선 및 배관에 인기 있는 선택이 되었습니다.

PVC는 다양한 색상과 마감재로 제공됩니다. 예를 들어, 판자 홈 패턴이나 실제 나무의 모양을 모방한 나무 질감을 얻을 수 있습니다. 이것들은 욕실과 주방에 좋습니다.

천장에 가장 흔한 색상 중 일부는 흰색 음영입니다. 하지만 에너지를 절약하기 위해 올바른 단열재를 사용하는 것이 중요합니다.

집의 단열재로 PVC를 사용하는 또 다른 이점은 저렴하다는 것입니다. 많은 단열재 제품은 재활용 소재로 만들어져 생산되는 폐기물의 양을 줄입니다.

단열재를 선택할 때는 원하는 장벽 유형도 고려해야 합니다. 잘못된 유형을 선택하면 전기 요금이 더 비쌀 수 있습니다. 투자에서 최대한의 가치를 얻으려면 집의 온도와 해당 지역의 기후를 고려해야 합니다.

마지막으로, 선택한 재료의 품질을 고려해야 합니다. 친환경적일 뿐만 아니라 가족에게 안전해야 합니다. 무독성이고 재활용 가능한 재료를 선택하세요.

PVC 제품에 사용되는 가소제

가소제는 PVC의 유연성과 기계적 특성을 증가시키는 첨가제입니다. 또한 폴리머의 UV 저항성을 향상시키는 데 사용됩니다. 유형에 따라 생물 기반이거나 부분적으로 생물 기반일 수 있습니다. 실내 벽과 천장에 사용되는 일반적인 가소제가 많이 있습니다.

디-2-에틸헥실 프탈레이트는 PVC에서 가장 널리 사용되는 가소제 중 하나입니다. 그것은 좋은 겔화, 유연성, 전기적 특성을 제공하며 무취, 무색입니다. 이 분자는 폴리머의 흐름을 개선하는 데 도움이 되는 이온 교환 능력을 가지고 있습니다.

PVC의 저렴하고 가볍고 내구성 있는 특성은 건설용 애플리케이션에 이상적입니다. 유연한 PVC는 카펫 뒷면과 실내 장식 직물, 그리고 음향 천장 표면에 자주 사용됩니다.

벤조에이트와 디벤조에이트 에스테르는 PVC 수지의 점도를 낮추는 데 효과적인 고용매화성 가소제입니다. 그러나 일반적으로 PVC의 주요 가소제로 간주되지 않습니다.

가소제로 사용되는 식물성 오일 유도체에는 여러 종류가 있습니다. 그 중 일부는 재생 가능한 알칸산에서 유래되었으며 다양한 건축 및 건설 최종 용도로 사용되었습니다. 이 외에도 생물 기반 가소제는 재생 가능한 이소소르비드에서 유래됩니다.

폴리염화비닐은 필름, 파이프, 전기 절연에 사용되는 일반적인 화합물입니다. 다른 용도로는 지붕재, 바닥재, 창 프로필이 있습니다. PVC의 유연성을 더욱 높이기 위해 여러 가지 선택적 첨가제를 사용할 수 있습니다. 이러한 첨가제에는 UV 안정제, 필러, 충격 개질제가 포함될 수 있습니다.

가소제를 선택할 때 고려해야 할 또 다른 중요한 요소는 폴리머와의 호환성입니다. 호환성이 없는 경우 삼출, 균열 또는 이동으로 이어질 수 있습니다. 또한 환경의 온도와 습도는 시간이 지남에 따라 변할 수 있으며 이는 가소제의 이동 또는 이동에 영향을 미칠 수 있습니다.

평방 피트당 거짓 천장 비율

가짜 천장의 가격은 지역마다 다릅니다. 일반적으로 가짜 천장은 사용된 재료에 따라 가격이 책정됩니다. 여기에는 관련 노동 비용도 포함됩니다.

석고와 석고는 가짜 천장에 가장 일반적으로 사용되는 재료입니다. 이러한 재료는 내구성이 뛰어나고 유지 관리가 쉽습니다. 그러나 비쌉니다. 비용을 절약하고 최고의 가짜 천장을 얻으려면 PVC를 선택하세요.

PVC 가짜 천장은 내구성과 쉬운 유지 관리로 인해 시장에서 점점 더 인기를 얻고 있습니다. 방수성이 뛰어나고 흰개미 방지 기능도 있습니다. 또한 설치가 쉽습니다. PVC 가짜 천장은 상업용 또는 주거용으로 사용할 수 있습니다.

또한 PVC 가짜 천장에 다양한 색상과 모양을 찾을 수 있습니다. 이것은 둔해 보이는 벽이나 천장을 숨기는 훌륭한 방법입니다.

PVC 가짜 천장의 또 다른 장점은 설치하기 쉽다는 것입니다. 게다가, 광택을 내고 칠할 수 있습니다. 따라서 모든 결함을 가릴 수 있습니다.

PVC 거짓 천장의 비용은 재료에 따라 다릅니다. 일반적으로 상업용 건물에 사용됩니다. 일반적인 거짓 천장 가격은 평방 피트당 Rs75에서 Rs120 사이입니다.

그러나 석고와 다른 재료를 조합하면 가격이 더 비쌉니다. 예를 들어, 라미네이트 천장을 선택하면 700루피에서 920루피 사이가 듭니다. 마찬가지로 거짓 천장에 목재를 사용하기로 선택하면 350루피에서 600루피 정도를 지출해야 합니다.

가장 일반적인 옵션은 아니지만 PVC 거짓 천장은 많은 부동산 소유주에게 인기 있는 선택입니다. 예산이 있든 없든 이러한 옵션은 고려해 볼 가치가 있습니다.